
1. Click on the “Frequently Used” or “Candidate” tab.
2. Select “Candidate Hunter” to navigate to the Hunter screen.
In the screen that opens, you can filter based on candidates’ resumes using a variety of tools. For example:
![]() – Hides candidates that have been assigned a negative status that freezes them
– Hides candidates that have been assigned a negative status that freezes them
![]() – Displays candidates sorted by their update date in the system, from most recent to least recent
– Displays candidates sorted by their update date in the system, from most recent to least recent
![]() – Shows only temporary candidates in the system — those who submitted resumes in an unsupported format, or those without enough personal details.
– Shows only temporary candidates in the system — those who submitted resumes in an unsupported format, or those without enough personal details.
Note — To use the Hunter optimally, do not check ‘Sort results by update date’, so that the most relevant candidates for your search are displayed.
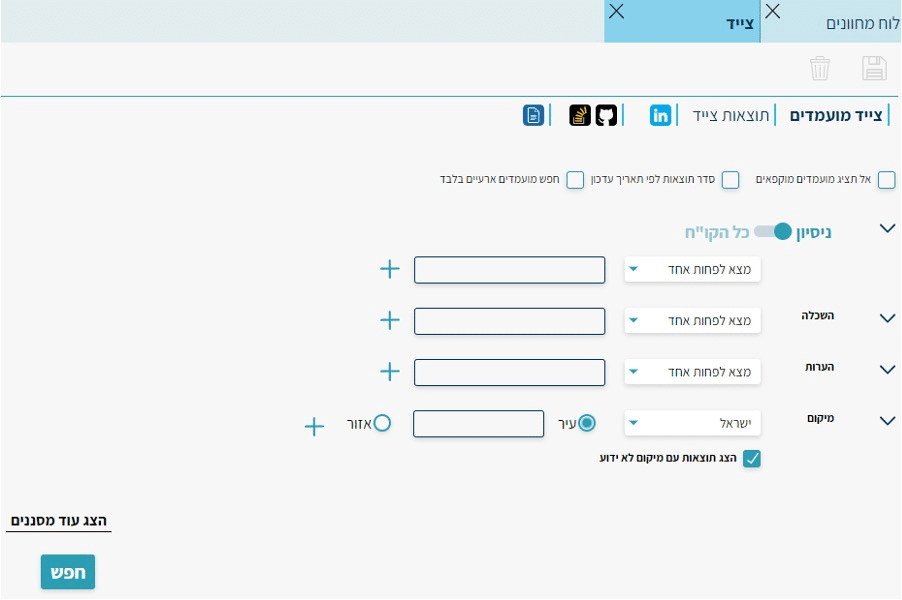
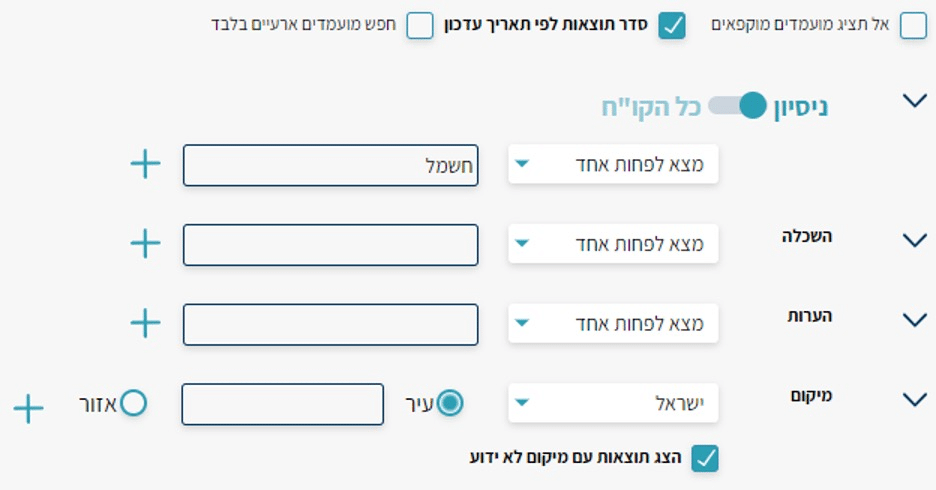
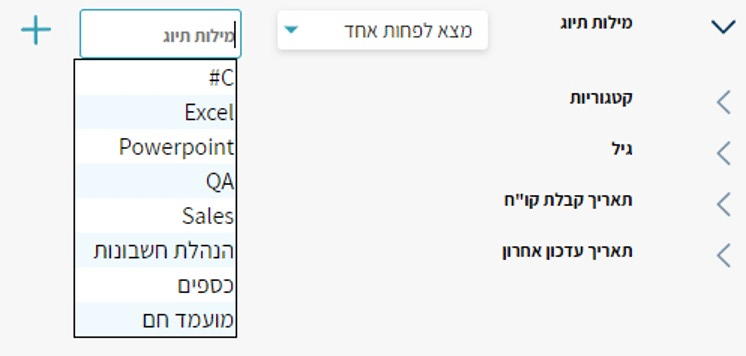
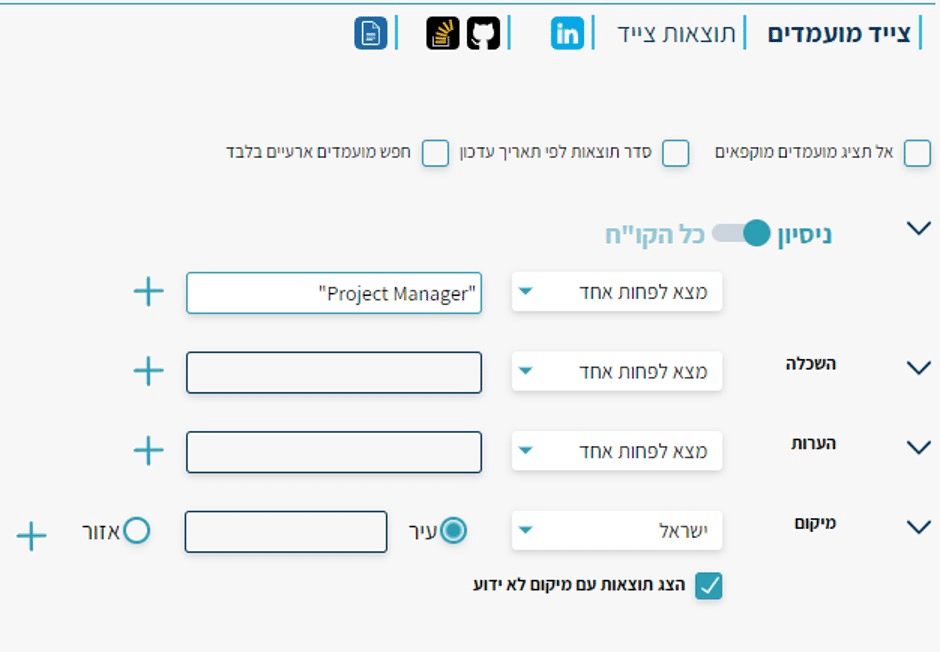
In the following fields you can choose the filtering method — by sectors in the resume (experience, education, notes) or search across the entire file.
 – Filter by sectors
![]() – Search across entire file
– Search across entire file
Note — When selecting All CV, the Education and Notes fields will be grayed out as follows
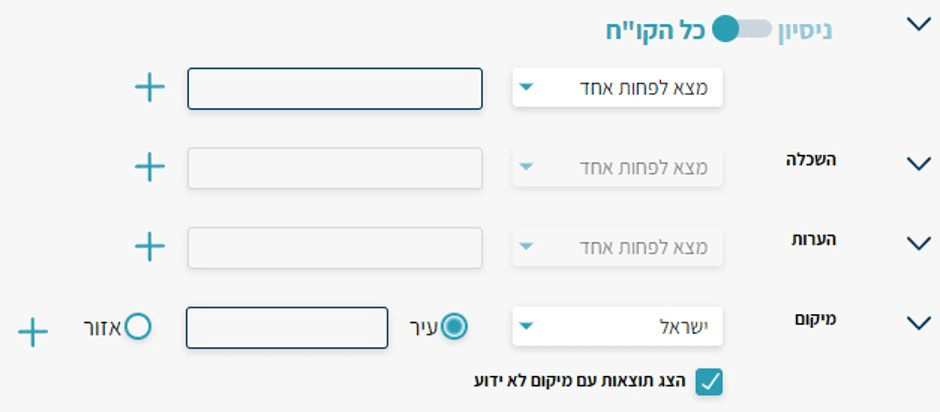
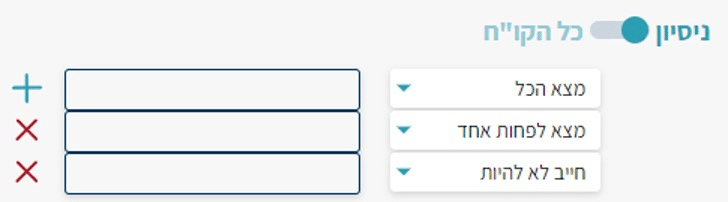
Next to each field there is a default check option of “Find at least one”. This filter searches for one of the words entered in that row, and if it appears — it will be highlighted. With this filter, candidates will appear if at least one of the entered words is present.
The additional options available are:
Find All — searches for candidates whose resumes contain all the words in the row.
Optional — highlights the entered words but does not perform filtering.
Must Not Have — displays all candidates whose resumes do not contain the words entered in that row.
Next to each row there is a + that adds another filter row for that same section. You can add up to 4 more filter rows for each sector (5 filter rows in total).
In the following example, two additional rows were added for filtering on the experience section of candidates:
In the first row — all the words/phrases entered must appear in the candidates’ experience
In the second row — at least one of the words/phrases must appear
In the third row — the experience must not contain these words/phrases
Between all rows, an AND rule applies — the rules in the first, second, and third rows must all be fully met. Only candidates who meet all three filters will appear in the Hunter results.
Another available filter is by country and city/region. Here too, you can add up to 4 additional rows.

Currently the available filter is by city in Israel. By switching the selection to region, you can search for candidates who live in a specific area rather than a specific city.
The “Show results with unknown location” filter will display candidates who did not specify where they live in their resumes.
The Hunter accepts words, numbers, and phrases.
To search for a single word — enter it as follows:
Behind the Hunter is a semantic morphological dictionary that also searches for the inflections of the entered word or words. Therefore, the search will also display candidates who wrote, for example, electrician, electric, etc.
If you want to search for an additional word in the same row, separate them with a space only (no comma, quotation marks, or any other character needed). An example is shown below:

The above Hunter will search for candidates who have at least one of the words — electricity or engineering, and their inflections.
To search for a phrase (2 or more words) — enclose it in quotation marks:

Note: You must close all quotation marks when searching for more than one phrase.
To search for an exact word without inflections — add a dollar sign after the word. Exact search works only in Hebrew.

In the example above, we are searching for candidates who are managers (male or female form), without the possible inflections of the word — management, managers, managed, etc.
To use word anchoring within a phrase — use the dollar sign after each word you want to anchor in the phrase:

This way you can search for candidates who wrote “electrical engineering” in their resumes. For example — candidates who wrote “electrical engineer” will not appear, since the word “engineering” is anchored.
After entering all our keywords, we’ll move on to the additional filters in the hunter.
Above the search button at the bottom of the screen – click on Show More Filters

After clicking on the additional filters, they will open on the side of the screen. Their purpose is to help filter candidates by parameters that are not found in their resumes.
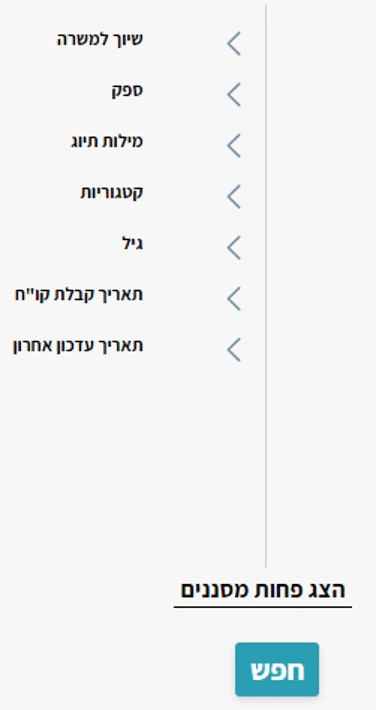
As you can see, there are several different filtering options.
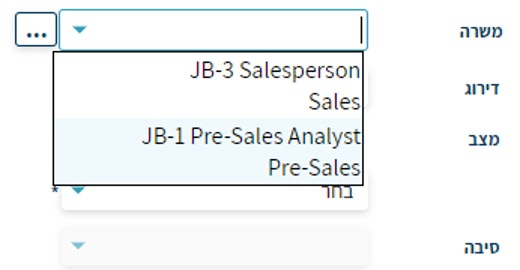
The first filter available is Job Assignment. Clicking the arrow next to the row will open the following fields:
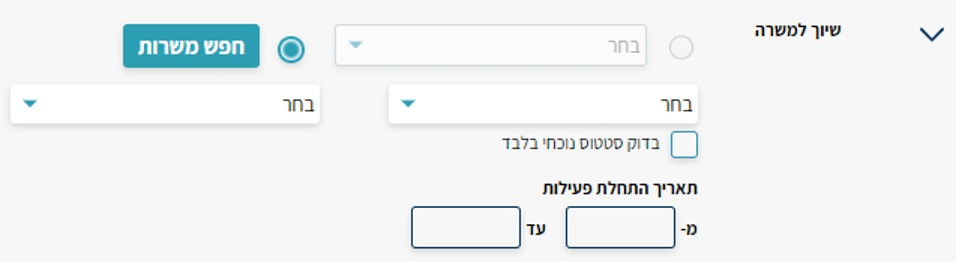
In the first row, Job Search is automatically selected.
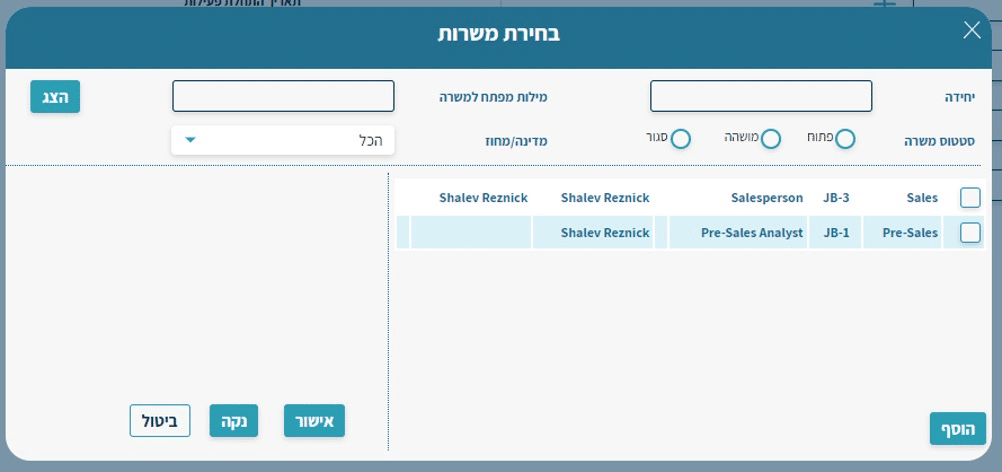
Clicking the “Search Jobs” button will open the following window:
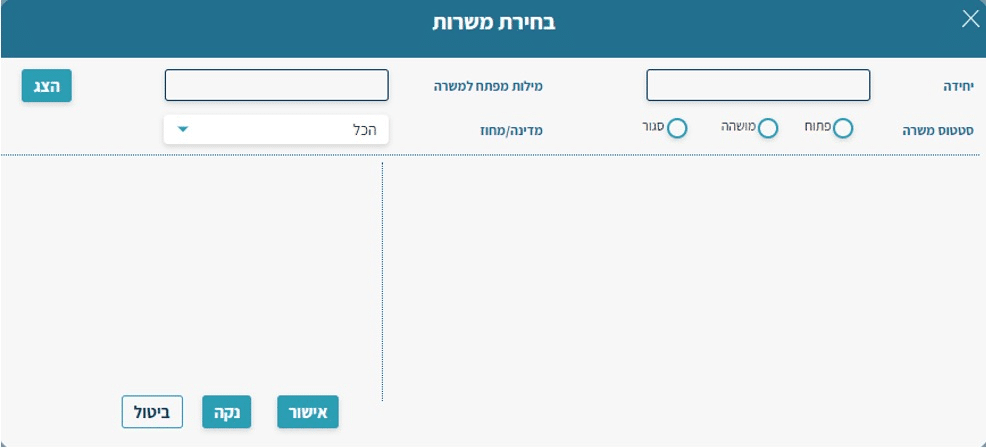
In the “Unit” field (or Client, if your system is the staffing agency version) – you can search by the unit or client you are recruiting for.
In the “Job Keywords” field – you can search by part of the job title or by the job code.
In the “Job Status” field – select jobs with the desired status.
In the Country/Region field – you can select jobs by their geographic area (if entered in the system).
Note: If you do not apply any filters, clicking “Show” will display all jobs you are currently working on or have previously worked on (open, suspended, and closed).
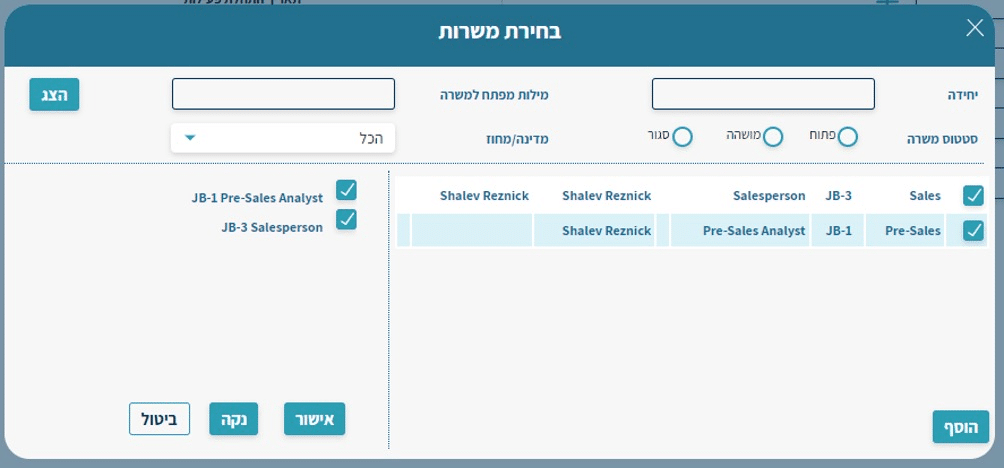
After running the search, the matching jobs will appear on the right side of the screen.

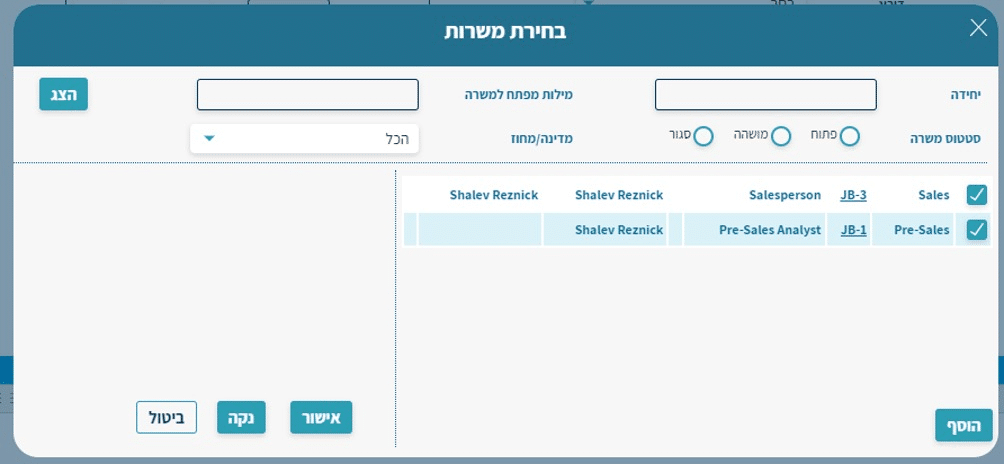
To filter the hunter results by jobs, check the checkbox next to the desired job(s) on their right side, then click “Add”.
Finally, click Confirm to apply the job filter.
Below the job search rows, there are two dropdown lists — filter by Status and by Status Reason.
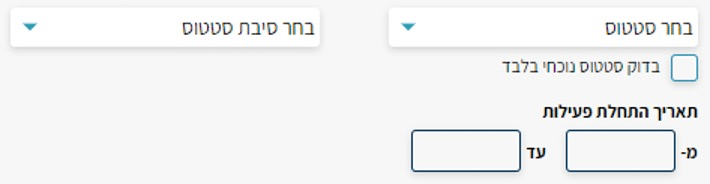
In the “Select Status” field, you can choose to display only the statuses you want to see.
For example – all candidates marked as suitable at the CV review stage. A sample screenshot is attached below.
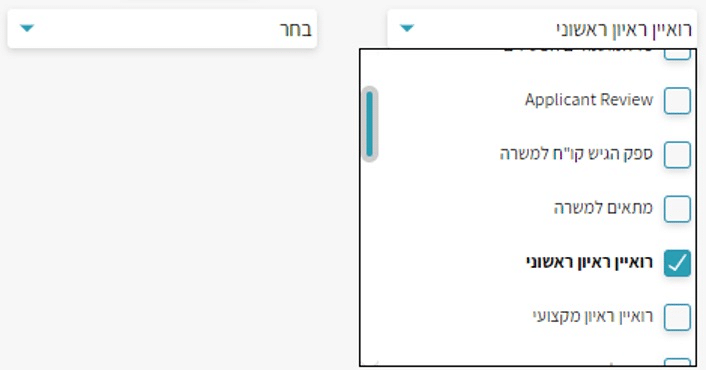
Select the status(es) you want to see and click the field again to close the filter.
- Beyond statuses, you can select all candidates (not required if no status was selected) or all active candidates – candidates who have passed the application stage and have not yet been hired.
In the adjacent field – “Select Status Reason” – you can choose the reason(s) you entered for that status.
The next filter below the status is “Check Current Status Only,” which means displaying candidates who are currently in this status in one of their jobs.
In the above case (candidate found suitable – at CV level), candidates will be shown who are currently in this status in one or more of their jobs.
The “Activity Start Date” field will show candidates who reached this status within the selected date range.
If you did not select a status but selected activity start dates – candidates who made a status change during that date range will be displayed (a job application, or a status change you made against a job).
In this field you can enter a start date only without an end date, so all results returned will be up to date as of the current moment.
The next filter is at the vendor level.
Clicking the arrow in the Vendor row lets you filter candidates who came from a specific vendor, or all candidates associated with a particular vendor type.
You can select up to one vendor or one vendor type.

The next filter is by tags.
Clicking the arrow in the Tags row lets you filter by tag words you have assigned to candidates.

To add a tag to the filter, click the “Tags” field and select the relevant word, or start typing the beginning of the word and the system will suggest matching words.

Just like the experience/education/notes filters – you can search by multiple criteria and add up to 4 more filter rows:
Find At Least One – finds all candidates who have been assigned one or more of the selected tags
Find All – finds all candidates whose profile contains all of the selected tags
Optional – finds all candidates, whether or not they have the selected tag(s)
Must Not Contain – finds all candidates whose profile does not contain the selected tags
If you selected a tag and want to remove it from the current filter – click the X on the tag label

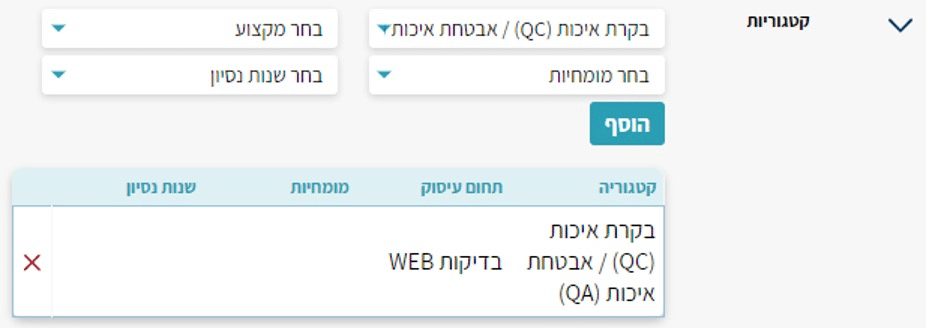
The next filter is by categories.
Clicking the arrow in the Categories row lets you filter by categories you have assigned to candidates.

Under the “Select Category” field, the existing categories in the system for candidates will appear. Clicking the field will open the list and you can select the category you want to filter by.
The “Select Profession” field contains the sub-categories of the category selected in the previous field. Here too, select the relevant sub-category for your filter.
The “Select Expertise” and “Select Years of Experience” fields contain lists that you can also filter by if you have entered them for candidates.
After selecting the relevant category for your current search, click Add so it is included in the filter.
Another available filter is by candidate age.
Clicking the arrow in the Age row lets you filter by a desired age range. The filter can be set from one specific age to another, from a specific age with no upper limit, or up to a specific age with no lower limit.
In addition – you can choose whether to include candidates who did not specify their age in their resume.

Our last two filters are by date.
The first filter is by CV received date.
Clicking the arrow in the CV Received Date row lets you filter by the dates candidates were submitted to the system.

From a specific date to another date, from a specific date to today, or from any date up to a specific date.
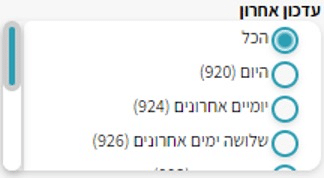
The second filter is by last update date.
Clicking the arrow in the Last Update Date row lets you filter by the time the candidate’s profile was last updated.

The update date refers to any change made to the profile itself – updating details, receiving a resume, changing a vendor…
From a specific date to another date, from a specific date to today, or from any date up to a specific date.
Once you have finished entering all your filters – click Search and you will receive the most relevant candidates.
After clicking Search and receiving results, you will be taken to the following screen:
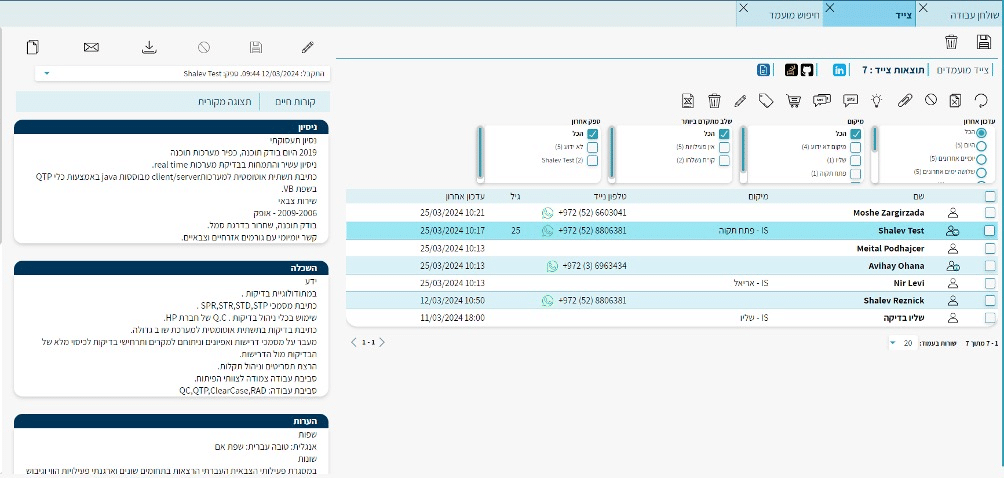
The screen you have reached is the Hunt Results. Here you can view all candidates who passed your filters successfully and perform various actions on them.
At the bottom of the screen — after scrolling through the results — you will see the number of pages and an option to increase the number of rows displayed, for your convenience.
![]()
In this screen you can see the stage the candidate is at via the figure icon in their row
– Candidates with no job in the system
– Candidates in the application stage with no further advanced activities
– Candidates who have started activity against one or more jobs and are in the initial stage
– Candidates whose CVs have been sent
– Candidates who have reached an advanced stage against one or more jobs
– Candidates who have been hired
– Temporary candidate. Submitted details and was entered into the system despite missing personal information (may also appear with one of the round icons)
You can perform additional actions on your candidates in the results screen by clicking one of the icons in the following row

 – By clicking the Attach icon, you can assign your candidate to the appropriate job.
Before clicking the icon, check the checkbox in the candidate’s row to select them, then click Attach
The following window will open where you can select the appropriate job(s) and the status the candidate will receive.
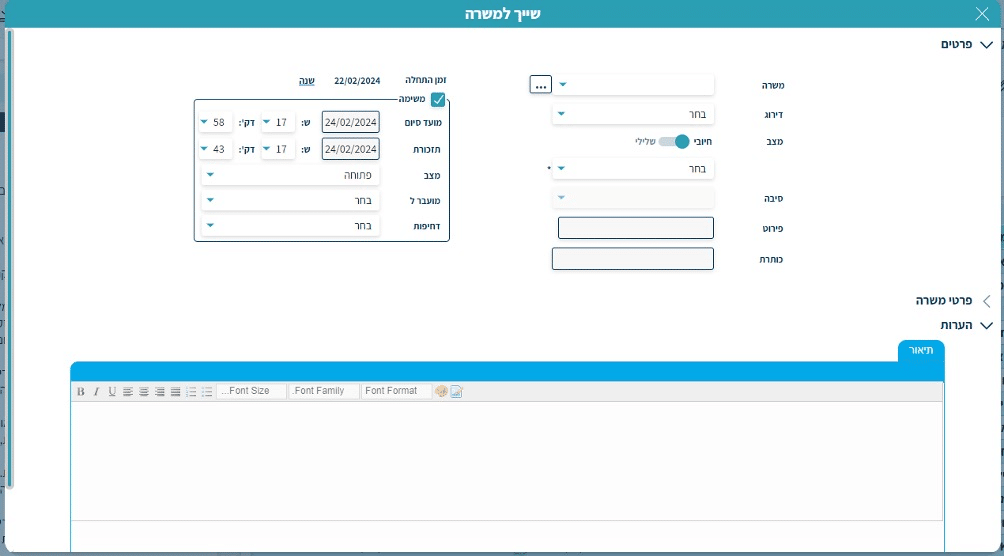
In the Job field, you can select a single job (click on the row)
Or you can select multiple jobs by clicking the 3 dots, and the following panel will open
Click Show to display all jobs. You can also search by job status (Open/Closed/On Hold).
After searching for jobs, check the relevant job(s) for these candidates and click Add, then Confirm.
After clicking:

Note that the job row will show Multiple Selection (if multiple jobs were selected)
![]()
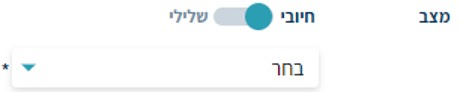
Next, select the desired state (positive or negative) and status for the selected candidate(s).
In the Description field, you can enter free text describing the details of your selection
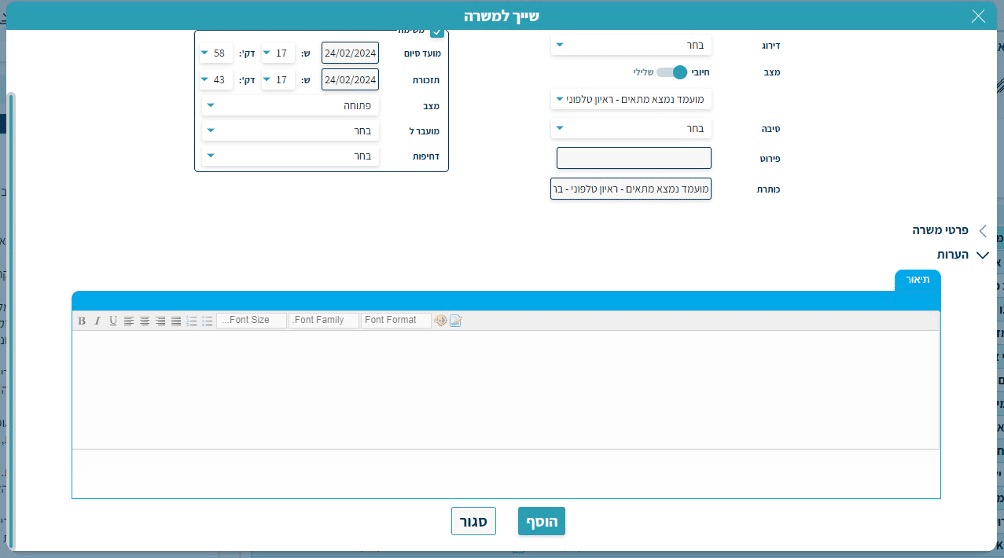
Finally, click “Add” to complete the assignment.
![]() – You can remove a candidate or candidates that appeared in the hunt but are not suitable for you.
– You can remove a candidate or candidates that appeared in the hunt but are not suitable for you.
Check the candidates you want to remove by ticking the checkbox in their row, then click the remove icon. Removal is from the hunt only, not from the entire system. When the row turns gray, you will know the candidates have been removed from the hunt.
Removing candidates from the hunt cannot be undone, unless a Refresh has not yet been performed.
In that case, keep the checkbox checked for the candidate(s) you want to restore and click the icon ![]() – Return the candidate to the hunt.
– Return the candidate to the hunt.
 – Refresh hunt results. Use this button after removing candidates from the hunt or when you want to see an updated view of the results.
Let’s now focus on a single candidate who appeared as a match based on the filters. The following details appear in the candidate’s row:
Full Name – you can click it to open the candidate’s card (expanded further ahead).
Location – the candidate’s city of residence, if recorded in the system
Mobile Phone – includes a link to start a direct WhatsApp conversation with the candidate
Age – if available in the system
Last Update – when the candidate’s card was last updated

On the left side of the screen, the candidate’s CV will appear, broken down by work experience, education, and notes.
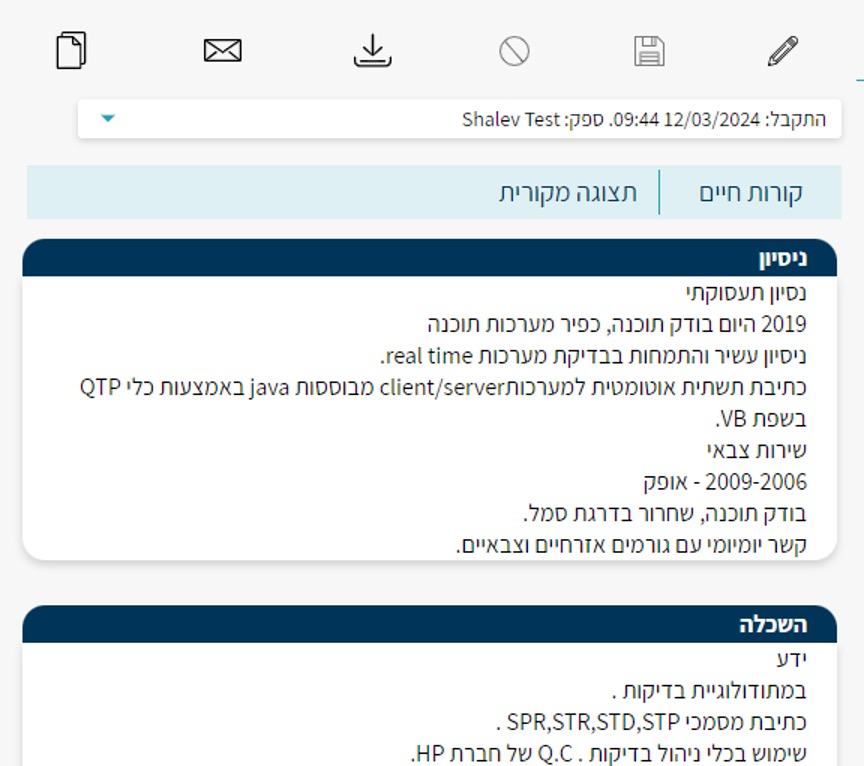
Several actions are available in this section of the screen:
Scroll down to read the CV
 – View the file as it was submitted
 – Download the CV file to your computer
 – View the email received by the system
 – Select which version to view (if multiple CV files exist for the candidate)
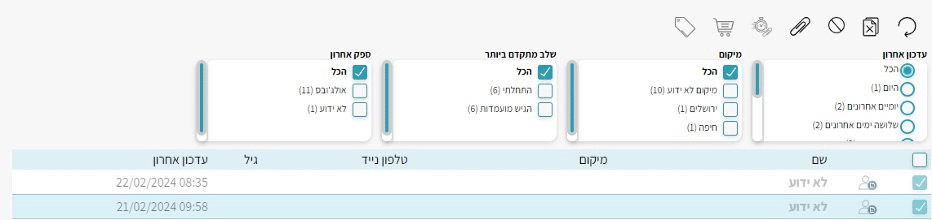
In the hunt results screen, 4 filter checkboxes appear as follows:

The filters in these checkboxes are not saved with the hunt you defined.
Through these boxes you can apply an internal filter by the date range of the candidate’s last update, and also see how many candidates were updated within each range.
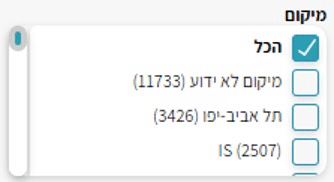
You can filter your results by more specific location and see the number of candidates from each city.
You can filter by the candidate’s stage — to review candidates you are not familiar with, or to see candidates at advanced stages against jobs.
And you can view candidates by selected vendors.
In the system you can save hunts so that you have quick access to them from your dashboard.

There are three types of hunts in the system — temporary, saved, and automatic.
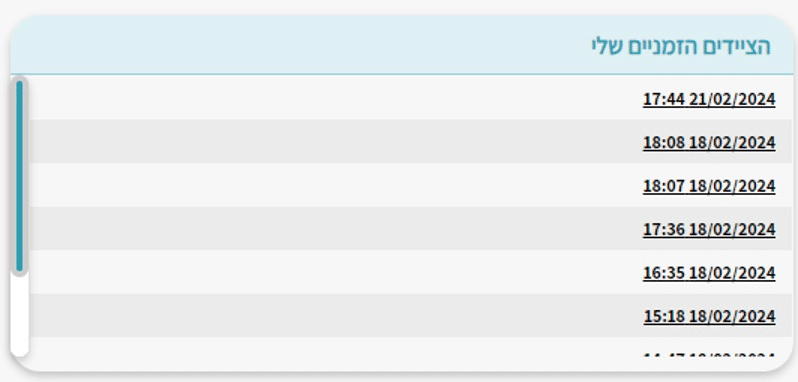
Temporary hunts are not saved in the system, but you have the option to access them again.
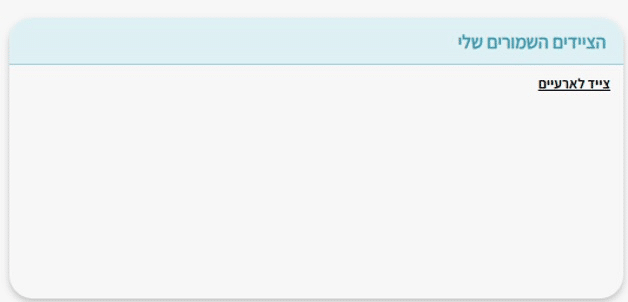
Saved hunts are hunts you have saved (whether linked to a job or not), and you can access them at any time from the dashboard. The hunt results are saved up to that point only, and no new candidates will be added.
Automatic hunts are hunts you have saved (linked to a job or not), and you can access them at any time through the dashboard. Automatic hunts update in real time and notify you when new candidates matching your filters enter the system.
These hunts were not saved, but you can access them at any time by clicking their row in the “My Temporary Hunts” panel.
These hunts were saved, but they do not notify you of new candidates matching the filters you defined, which is why they are not classified as automatic hunts. Here too, clicking the hunt name takes you to its results.
How do you save a hunt as a regular (non-automatic) hunt?
After receiving results for your filters — click the Save button at the top of the hunt –  – and you will be taken to the following screen:
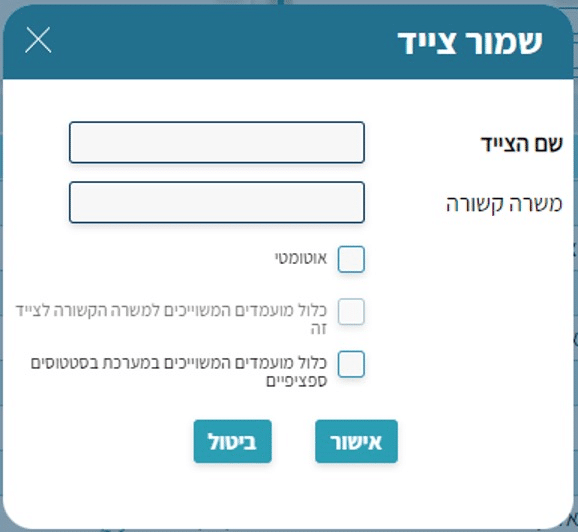
Give your hunt a meaningful name that briefly describes what it does
If your hunt is intended for a specific job — select it from the “Related Job” list and check the checkbox 
Check the following checkbox –  – so that the hunt displays candidates associated with the statuses you selected.
Finally, click Confirm, and the hunt will be added to your “My Saved Hunts” list.
Automatic hunters are smart hunters that update online and notify you in real time about new candidates who entered the system and match the filter you created.
How do you save an automatic hunter?
Once you receive results for your filter – click the save button at the top of the hunter –  – and you will be taken to the following screen:

Give your hunter a meaningful name that briefly describes what it does.
Check the “Automatic” checkbox.
If your hunter is intended for a specific job – select it from the “Related Job” list, and check the checkbox 
Check the following checkbox –  – so that the hunter displays the candidates associated with the statuses you selected.
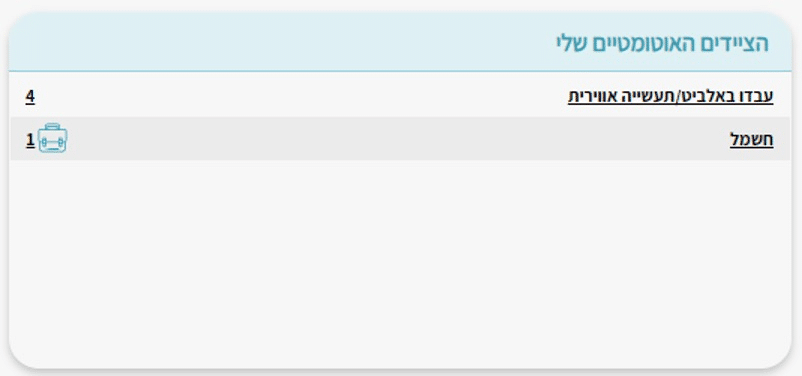
In the automatic and saved hunter panels on the dashboard, there are 2 additional indicators you can use.
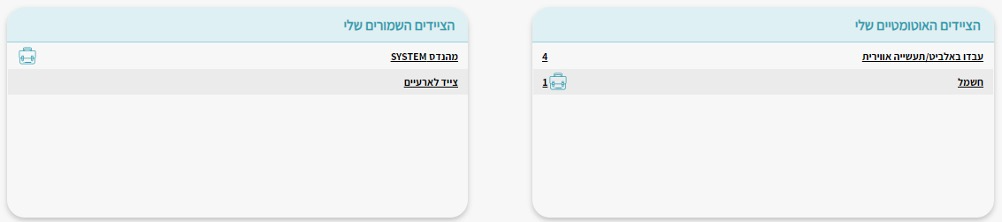
1. The briefcase icon ![]() indicates that the hunter is linked to a job in the system.
indicates that the hunter is linked to a job in the system.
Clicking it will take you to that job’s card.
2. Numbers (in automatic hunters)
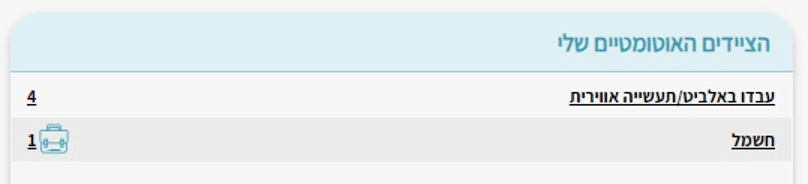
These indicate that there are new candidates who passed your filters and entered the hunters. These are additional candidates, not the total count of candidates in the hunter. Once you enter the hunter and return to the home screen, it will update to show no new candidates.

You can only delete hunters you have saved (automatic and saved).
To delete a hunter, click the trash icon at the top of the screen![]()
The following message will appear:
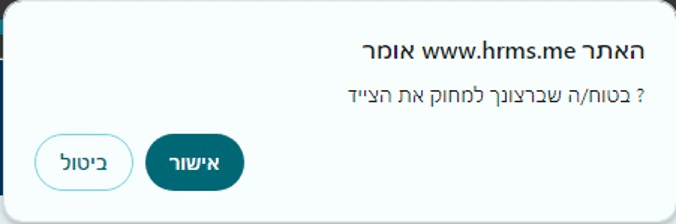
Once you do this, your hunter will be deleted from the dashboard.
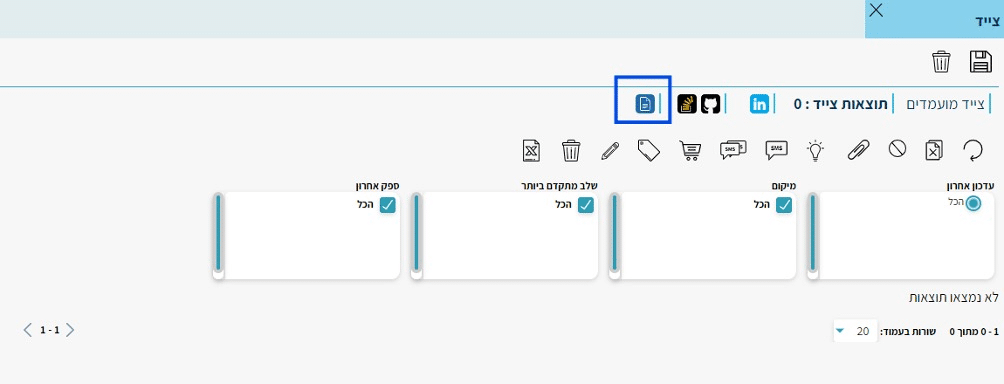
Searching for Candidates on External Social Networks:
The candidate hunter allows you to search for candidates on social networks such as LinkedIn, Stack Overflow, GitHub, and even Google!
Searching for Candidates via LinkedIn and Additional Social Networks
To search for a candidate via LinkedIn, enter your search keywords in the experience field the same way you search for candidates through the system, and select the country where you want to see candidates.
After entering the search keywords and country, click ‘Search’, and then immediately click the LinkedIn icon at the top of the hunter.
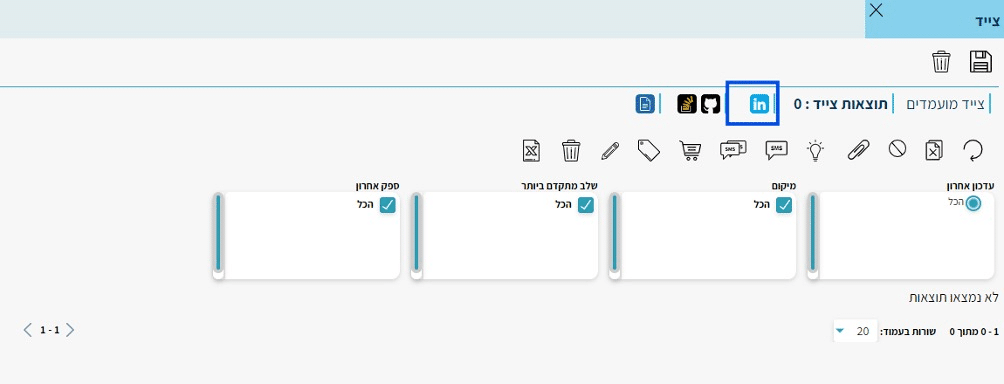
After clicking the highlighted button, you will be taken to the LinkedIn results screen.

On this screen, you can see LinkedIn profiles that appeared as matching the search keywords you entered in the hunter.
From this screen, you can switch to searching on different platforms such as GitHub and Stack Overflow, by clicking the following icons.

In the results screen, you can see profiles that appeared as matching on GitHub and Stack Overflow.

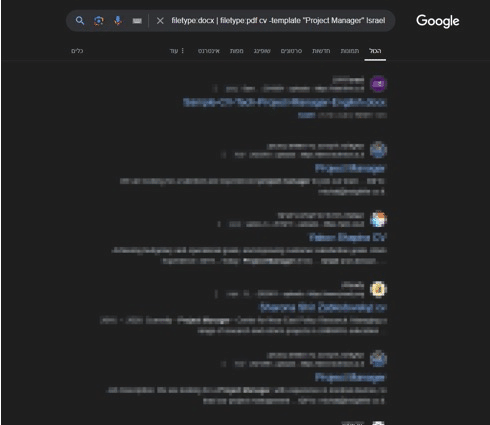
In addition, you can search for candidates via Google, directly from the candidate hunter.
For this search, click the leftmost icon in the icon row.
After clicking it, you will be taken to an external Google search containing links to resume files that match your needs!