Why Is It Important to Centralize All Files in One Place?
Managing recruitment processes and working with candidates, clients, and vendors involves daily work with numerous files:
Resumes, recommendation letters, education certificates, employment contracts, vendor agreements, meeting summaries, and more.
In HunterAI, you can associate each file with the relevant entity — such as a candidate, position, client, organizational unit, or vendor.
Properly associating files helps maintain order, accessibility, and efficiency, and saves significant time when searching for information.
When a file is uploaded to the system, it is not just saved — it also becomes accessible to the relevant people in the organization in an organized and secure manner.
How Is the System Structured in Terms of Entities?
HunterAI is designed for two main types of activity, and therefore the entities in it vary depending on the type of organization.
In Staffing Systems
The core entities are:
- Candidates
- Positions
- Clients
- Vendors (external recruitment sources)
In Organizational Systems
The core entities are:
- Candidates
- Employees
- Positions
- Organizational Units (departments within the organization)
- Vendors
In both cases, the system allows you to store documents in an organized manner within the card of the relevant entity.
In this guide, we will explain how to upload files correctly and ensure they are saved in the right place.
Steps for Uploading Files
1. Navigating to the Relevant Entity
Before uploading a file, make sure you are on the correct card in the system.
To do this:
- Go to the relevant module (for example: Employees).
- If the file is related to agreements or other documents, you may navigate to the Clients / Units / Vendors module.

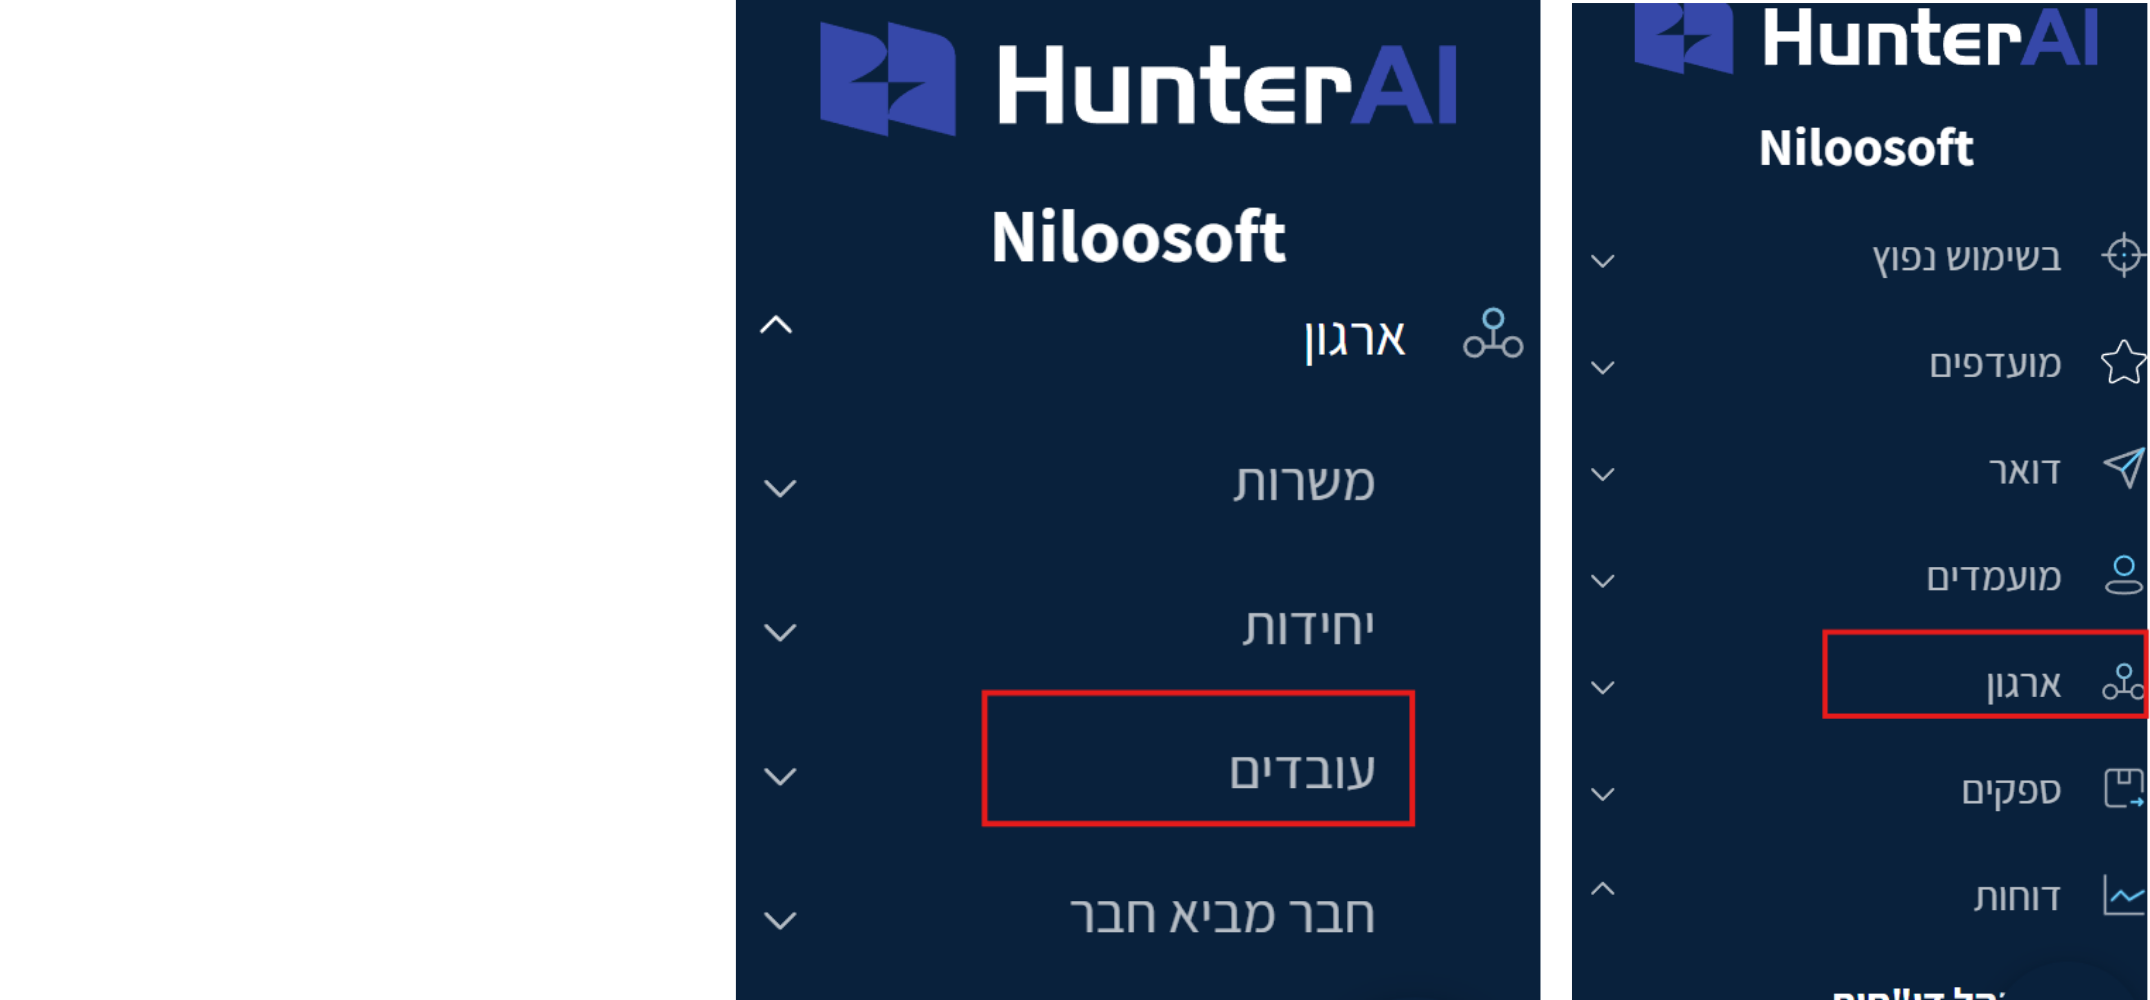
- Then open the specific card of the desired entity by clicking on its name (candidate, position, client, unit, or vendor).

2. Switching to the "Files" Tab
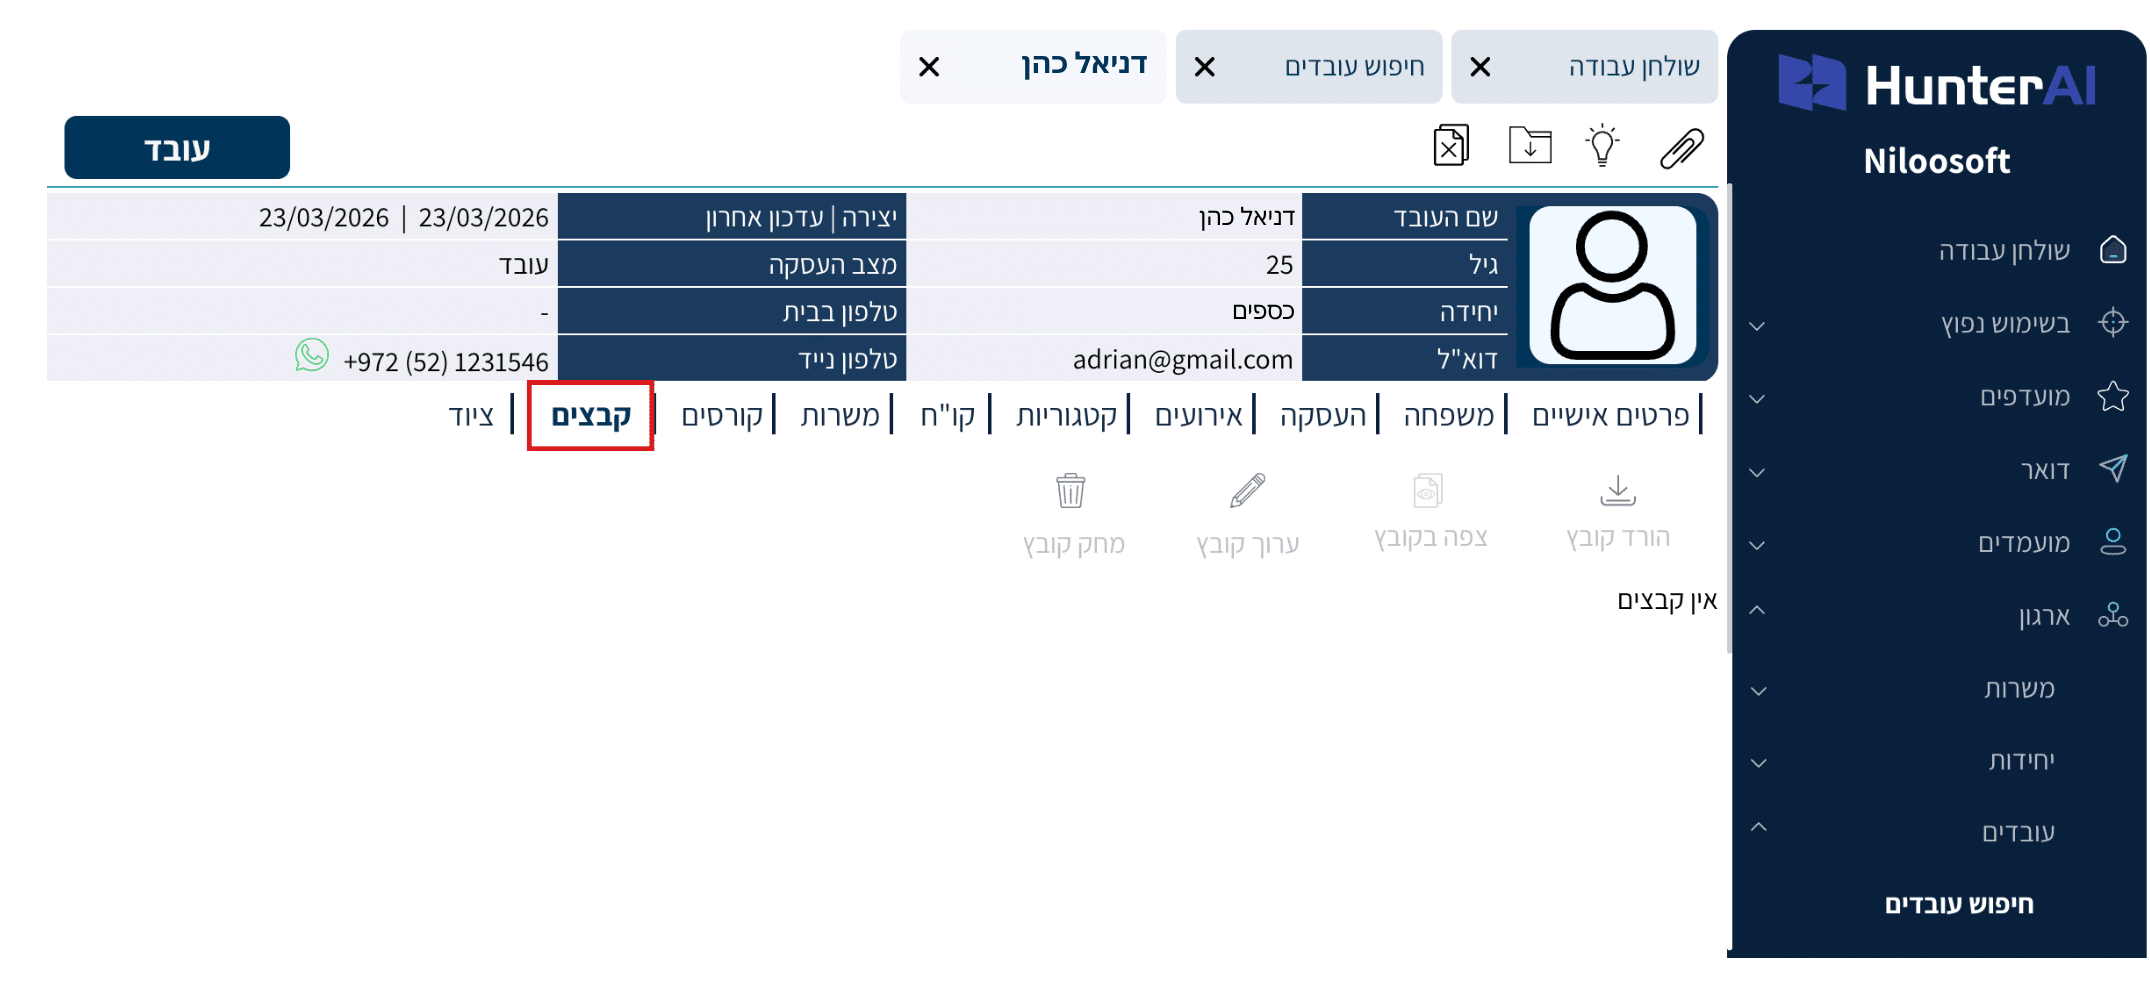
Inside the card that opens, you will see a top tab bar. To upload a file, click on the “Files” tab.
If you don’t see the tab, it may be located under the “More” menu when the screen includes many tabs.

3. Opening the File Upload Interface
After you enter the Files tab, a top toolbar will appear.
Depending on the entity you are in, an icon for adding a file will appear.

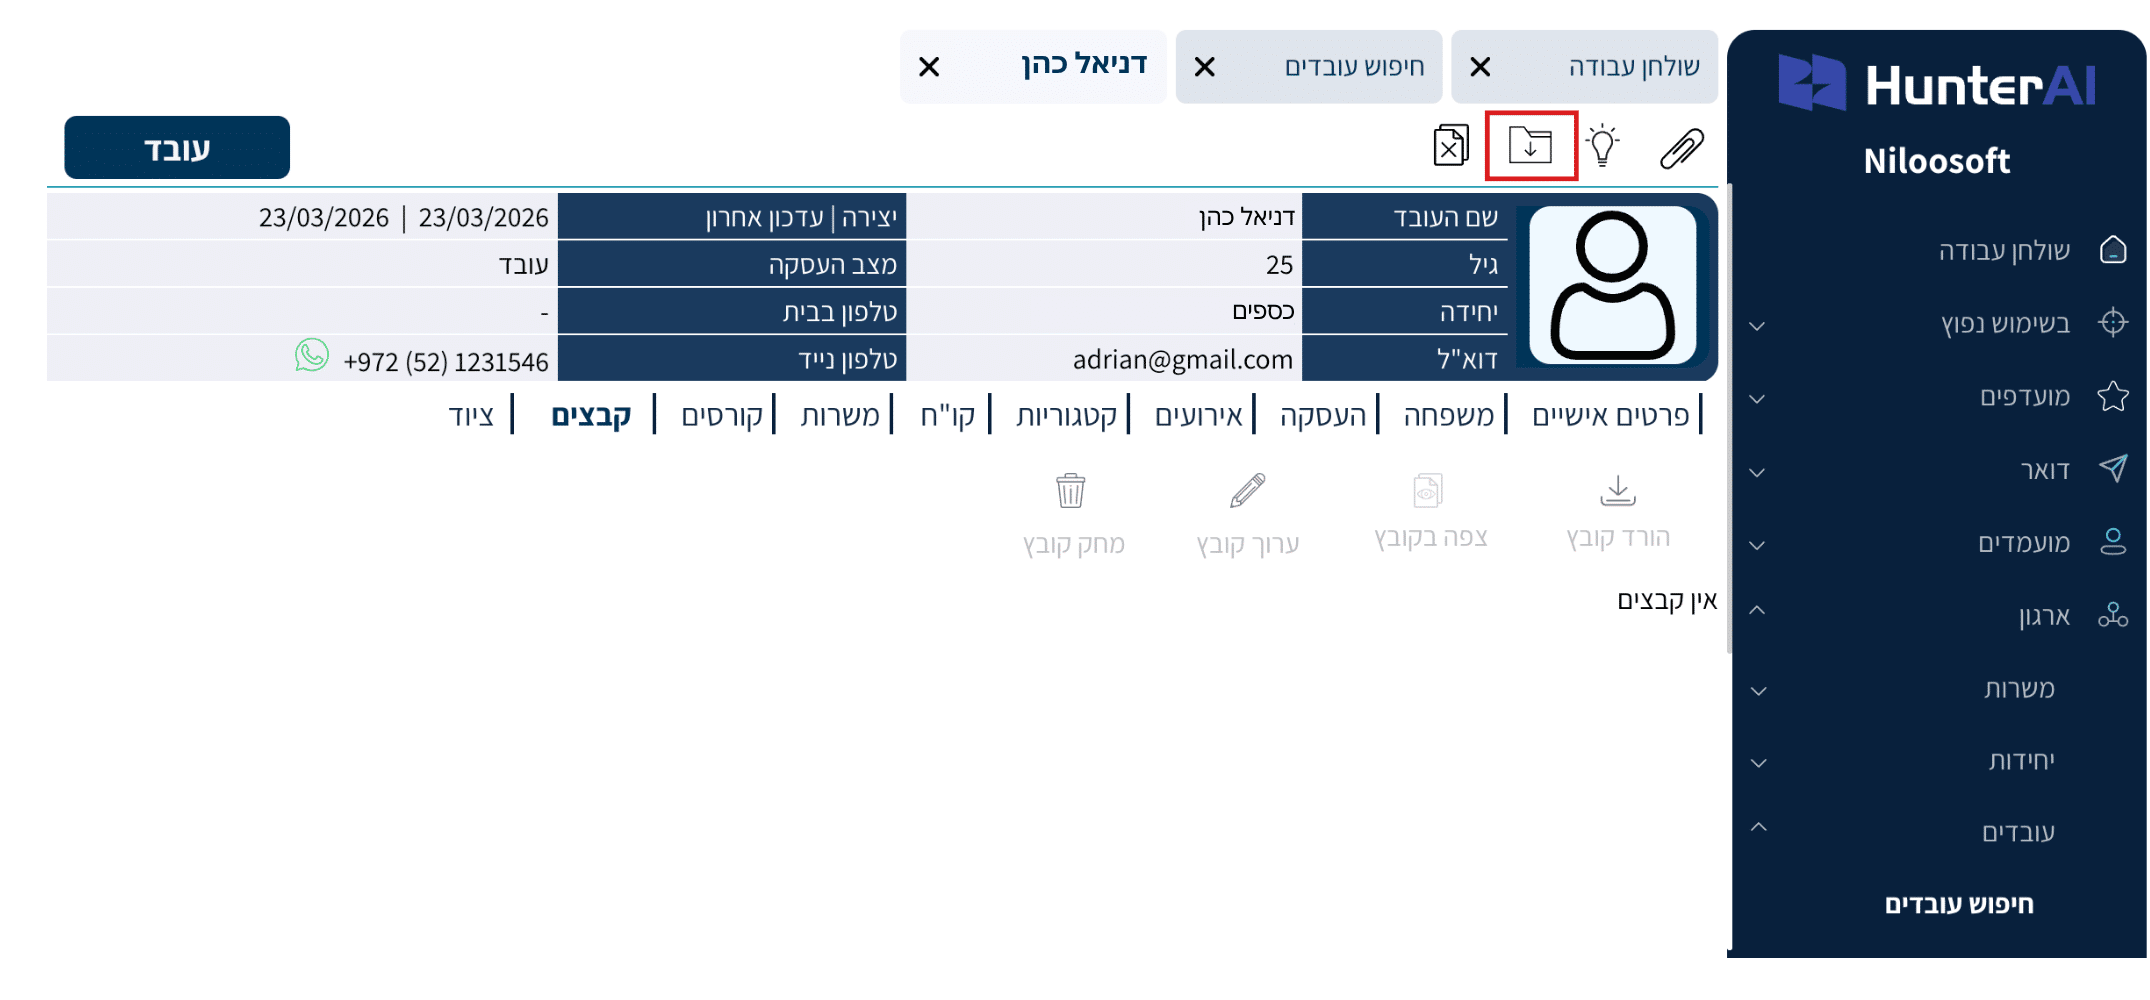
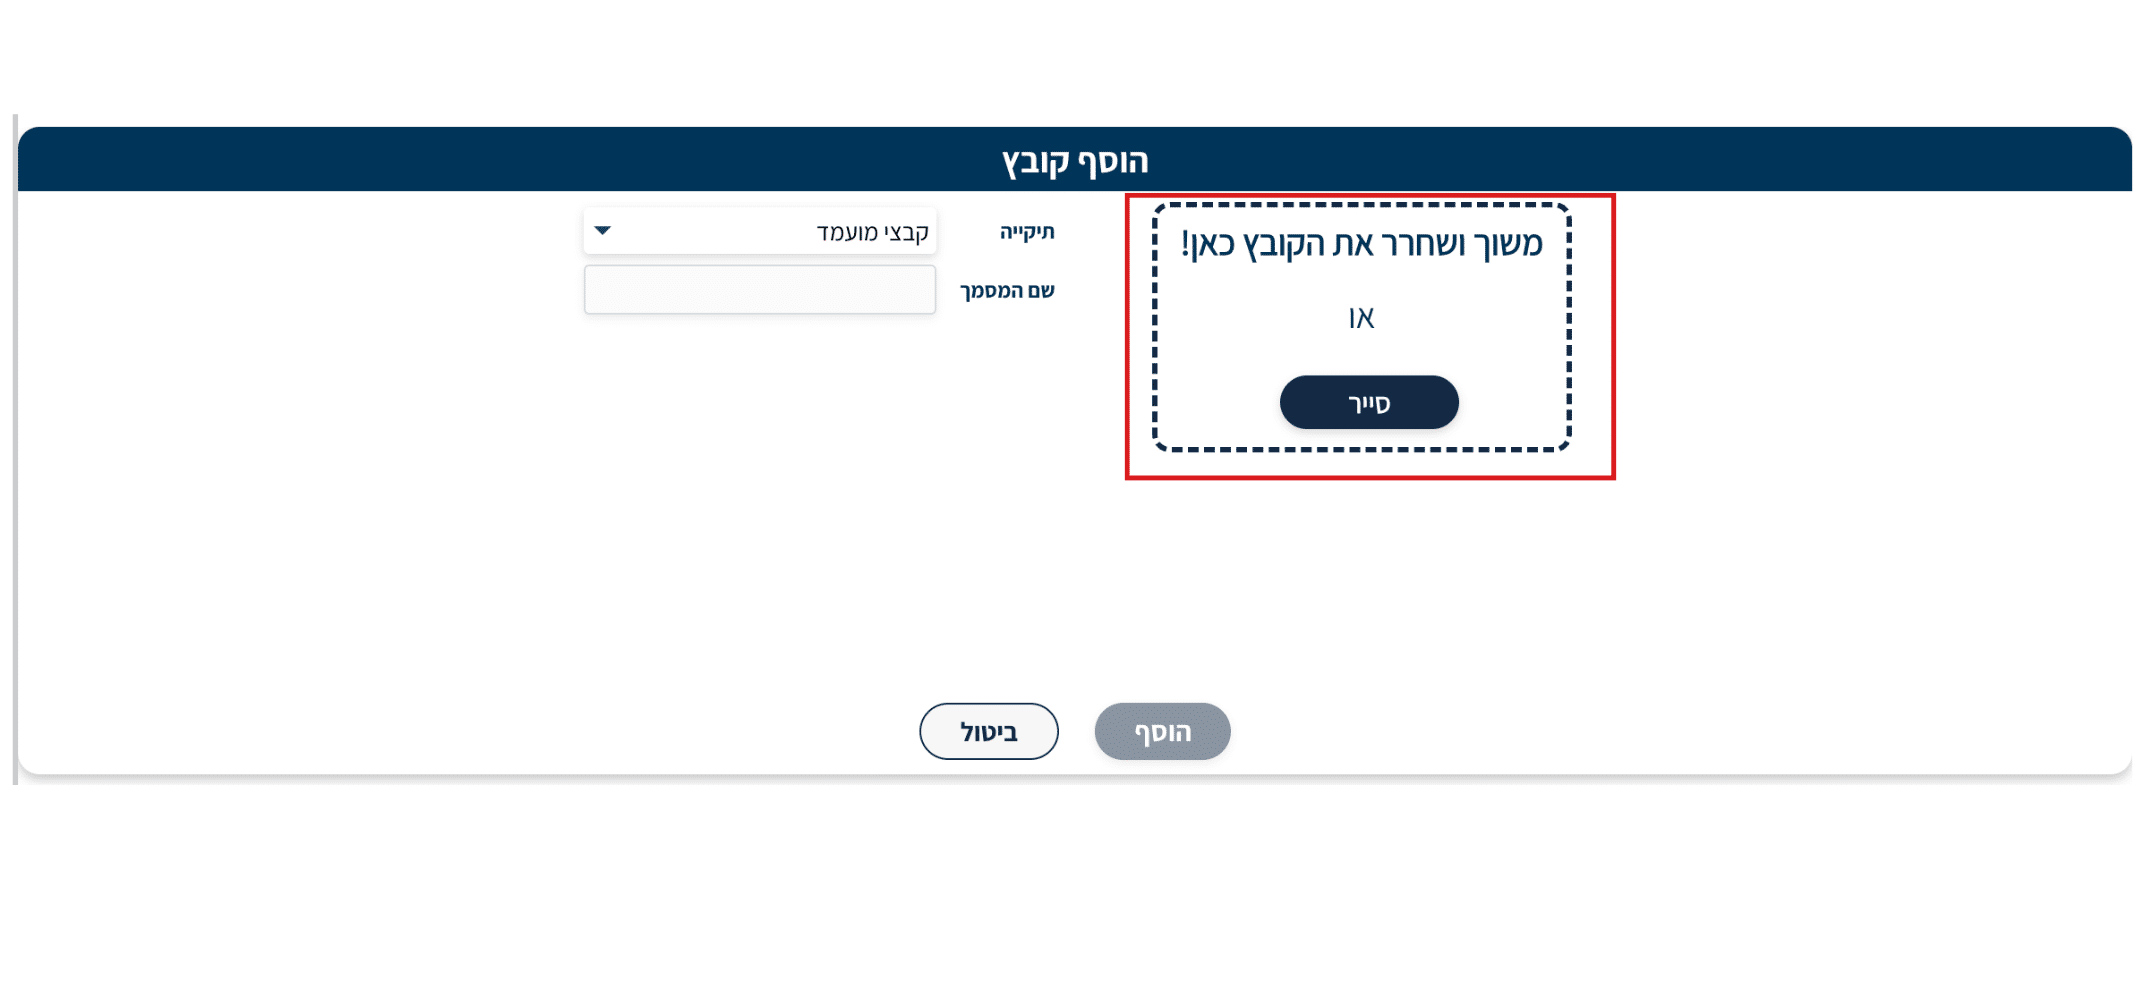
Clicking the icon will open a pop-up window called: “Add File”

4. Uploading the File to the System
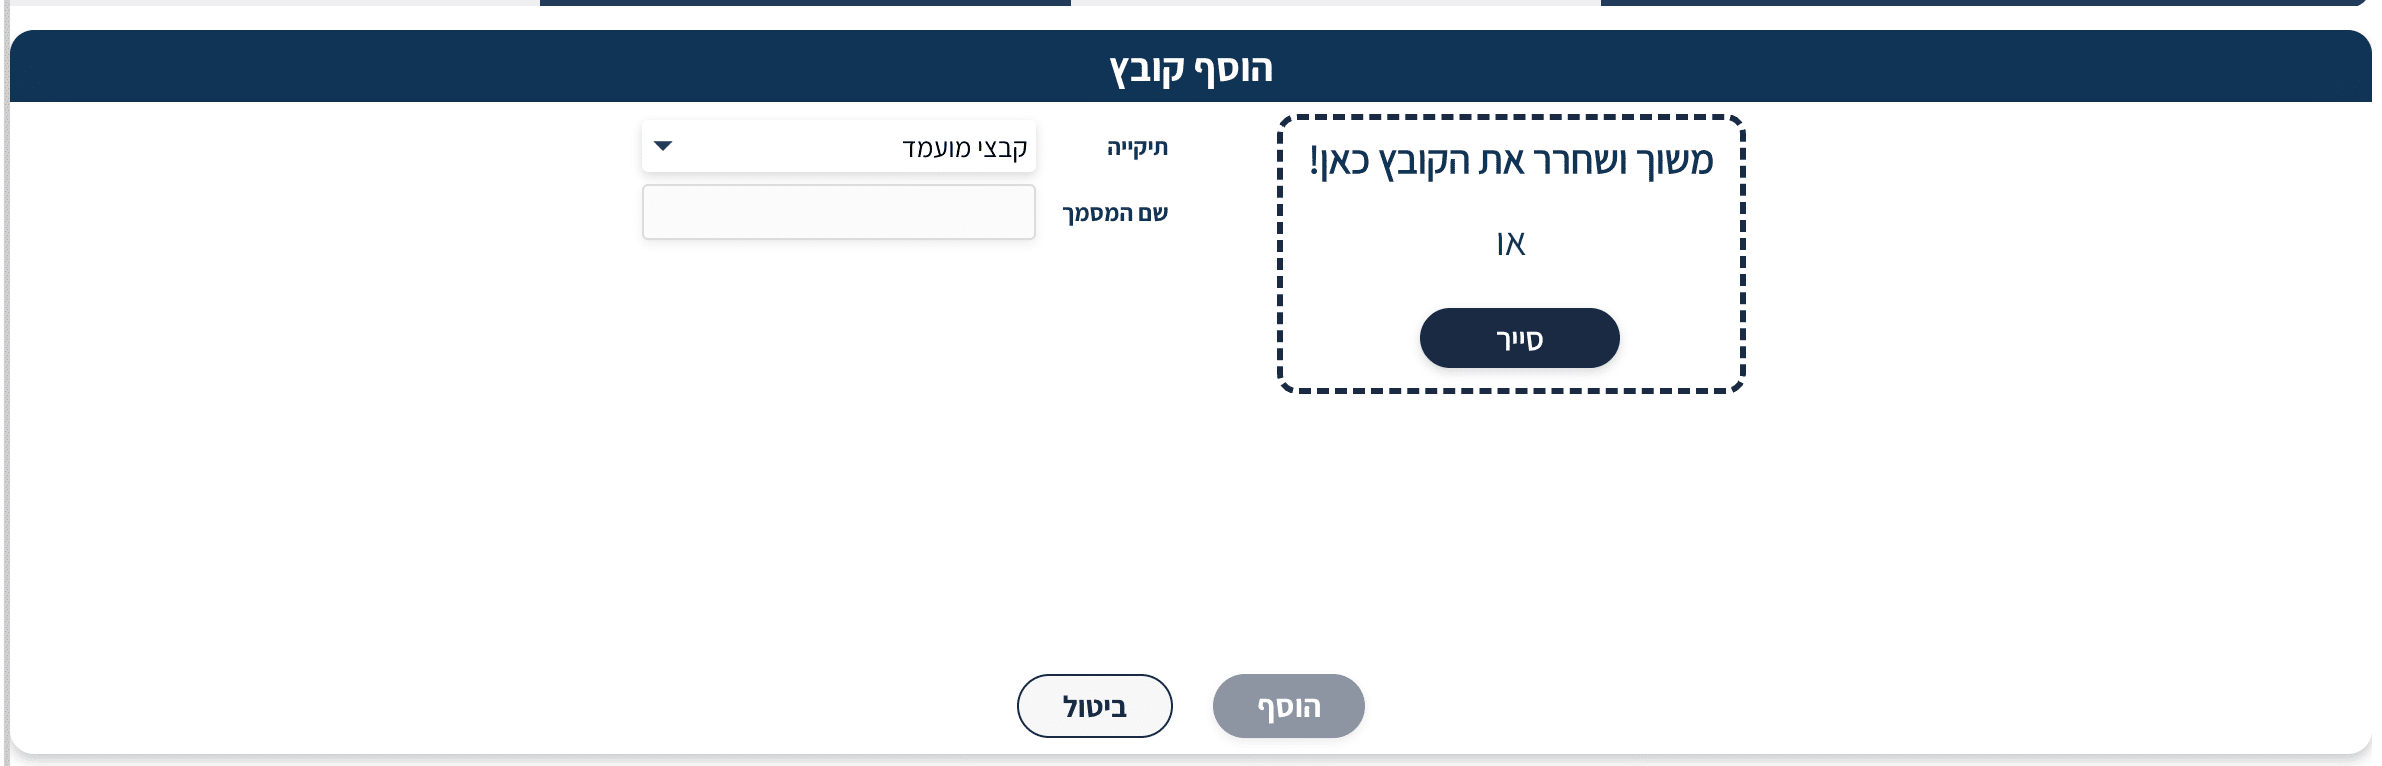
In the window that opens, you have two options to upload a file:
- Drag & Drop – You can drag the file from your computer directly to the dotted square that displays the text:
“Drag and drop your file here”
- Choose a File from Your Computer – You can also click the Browse button, then select the file from your computer’s folders using the file explorer.

5. Classifying the File in the System
Before clicking the “Add” button, make sure to properly classify the file.
At this stage:
- Select the appropriate folder from the list (for example: Resume, Contract, Vendor Files, etc.).
- Enter a document name in the appropriate field.

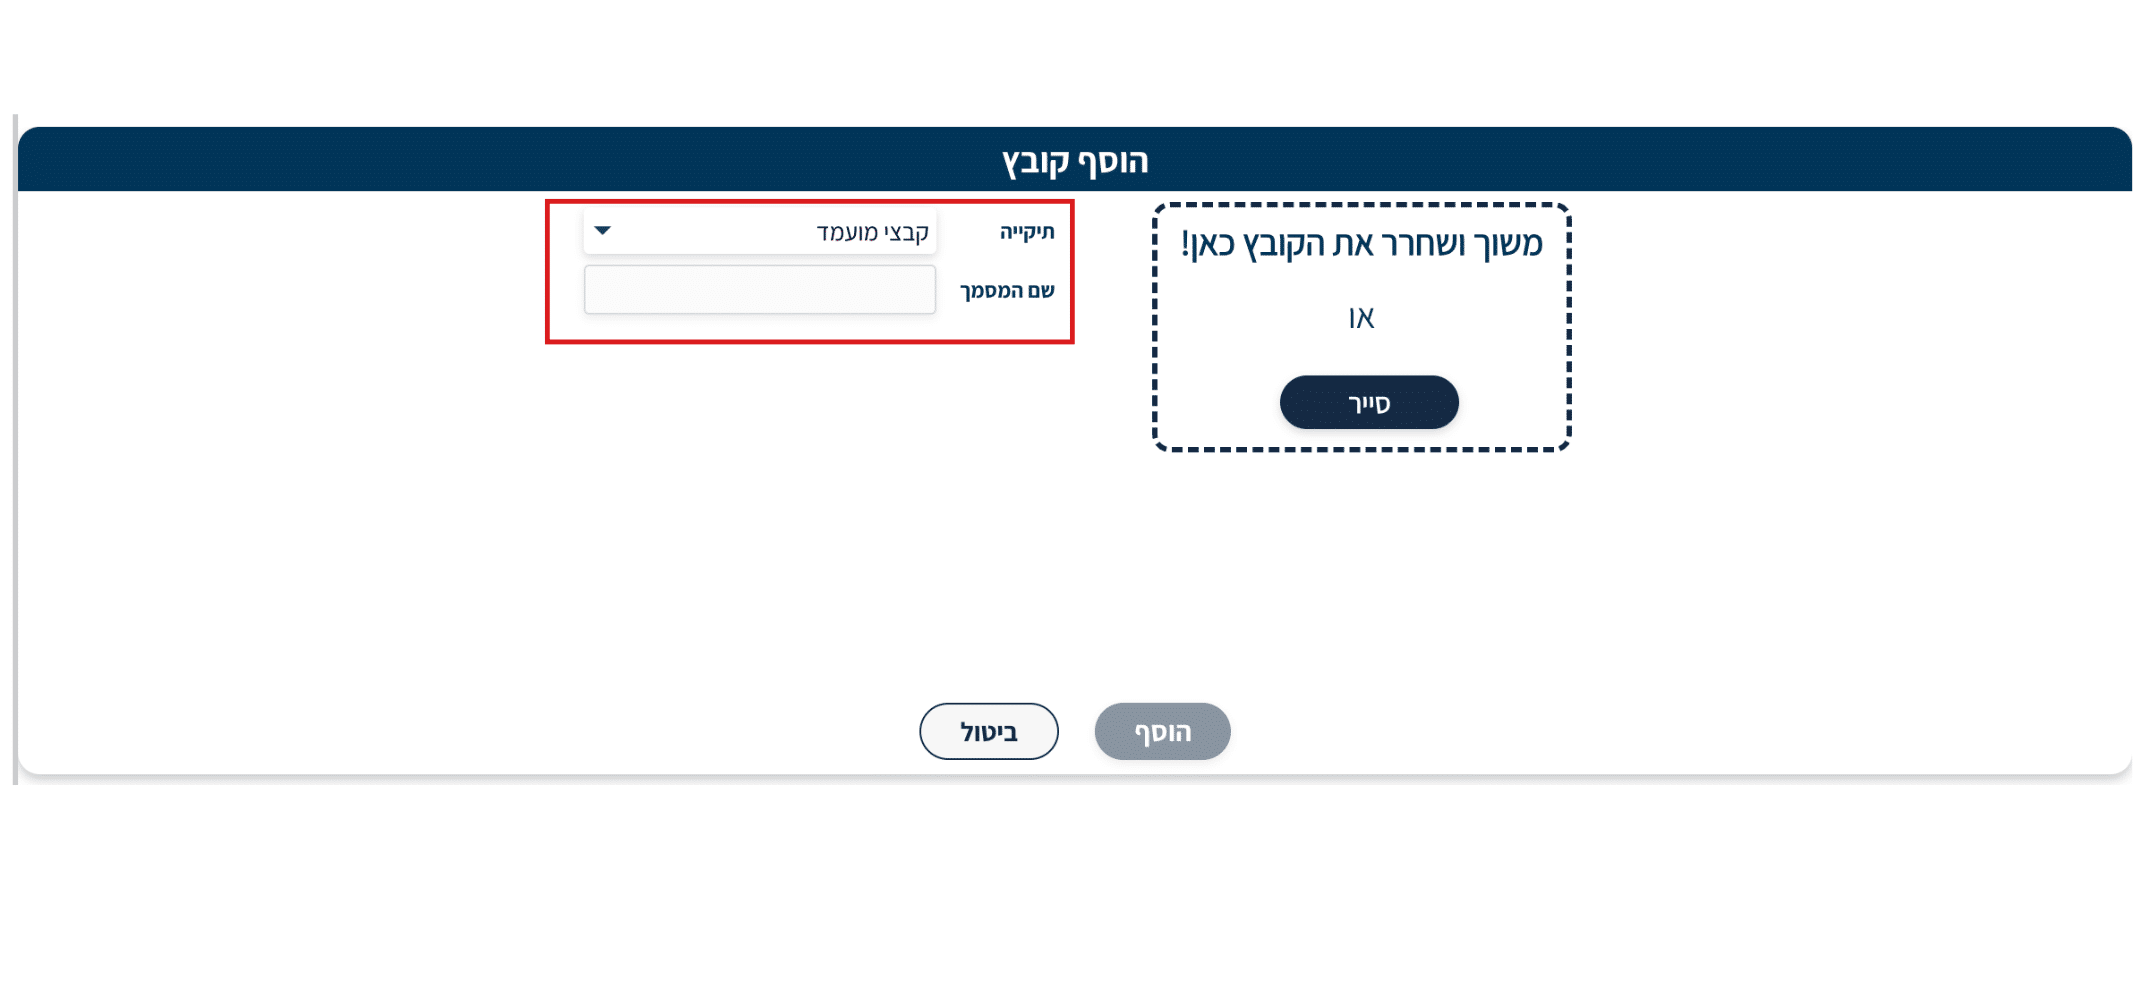
Properly classifying the file enables quick searching and organized management of documents going forward.
6. Verifying the Upload
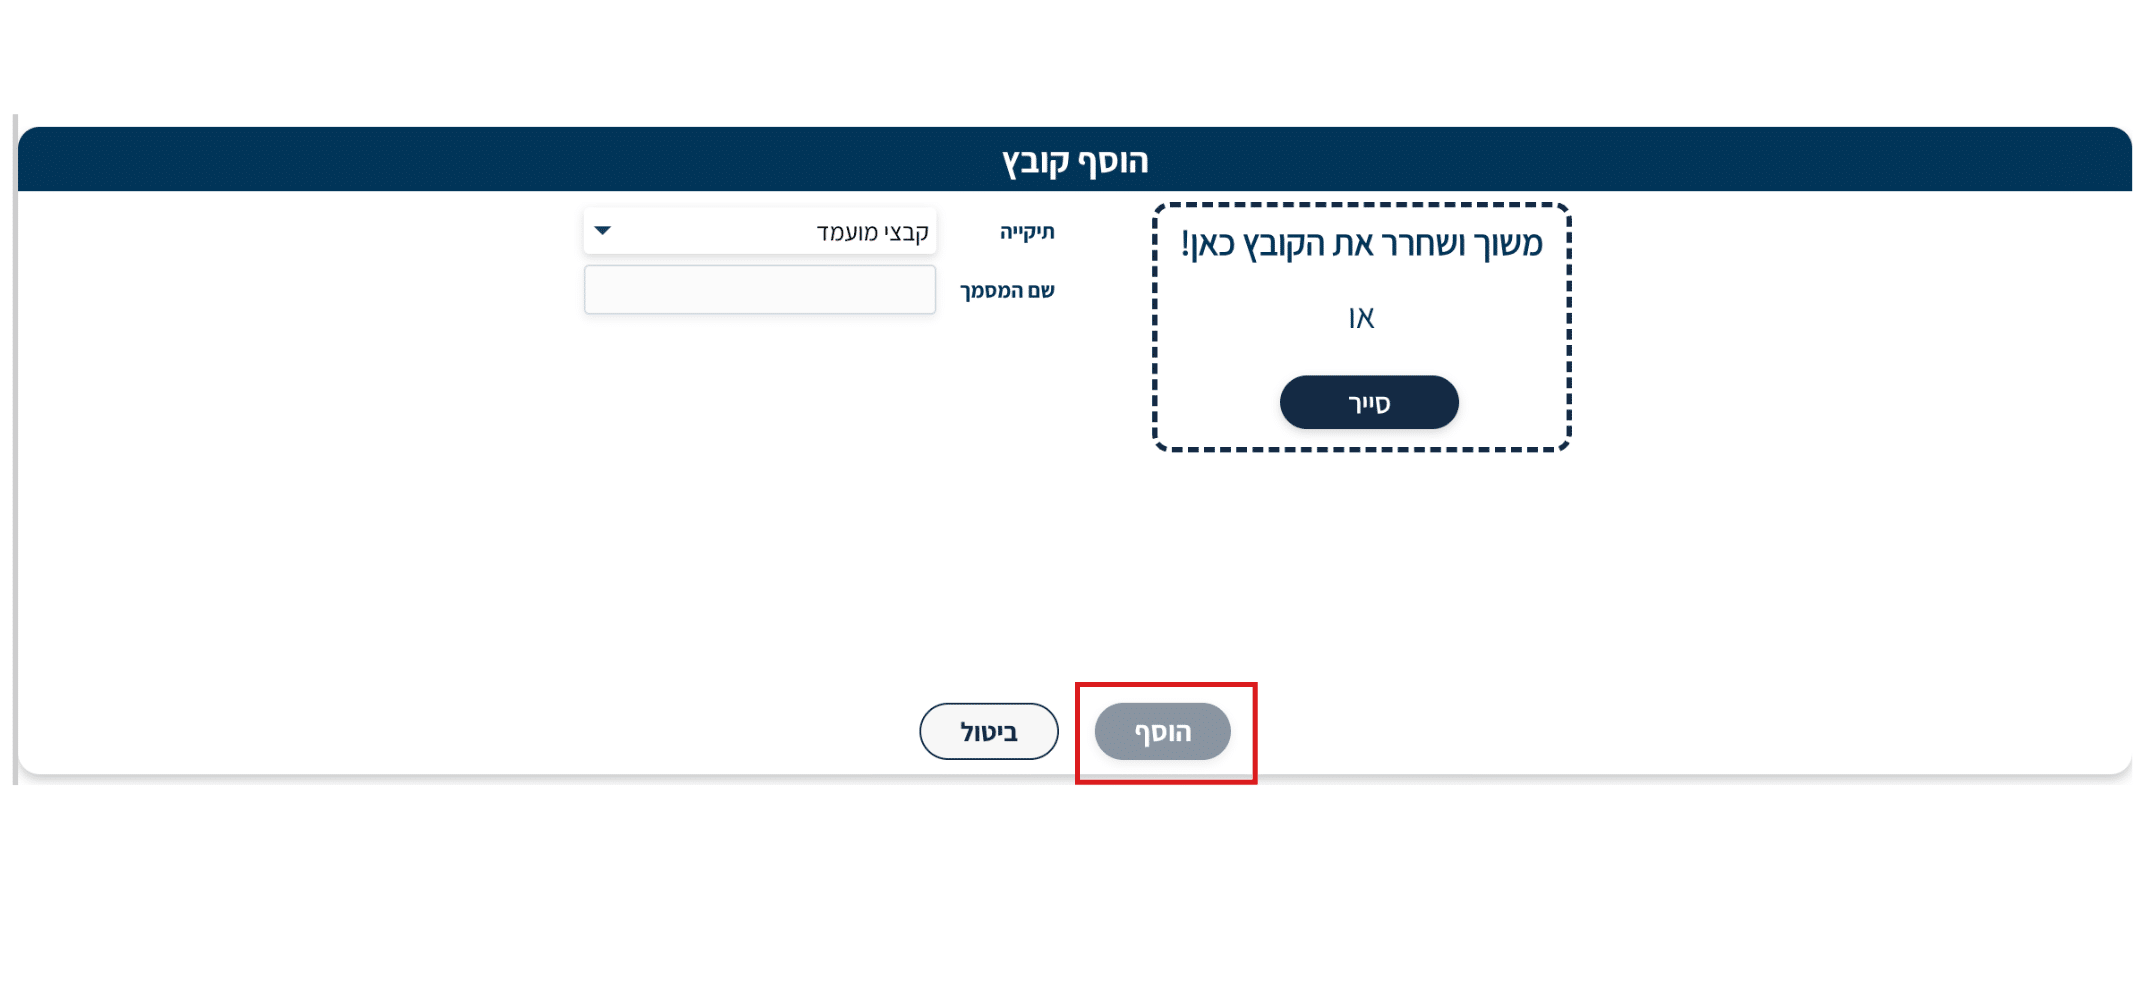
After clicking the “Add” button at the bottom of the window:
- Make sure the file appears in the file list in the tab.
- It is recommended to click on the file and open it to verify that it uploaded correctly and is not damaged or empty.

It’s important to know that this action is not limited to a specific entity — you can upload and associate files with any entity in the system, including candidates, positions, clients, organizational units, courses, and any other entity that exists in the system, according to your needs.
Security and Privacy Warnings (Very Important)
The recruitment system contains sensitive information about candidates, clients, and vendors.
Therefore, it is important to follow these rules:
- Upload only files that are directly related to the work process.
- Do not upload files that include:
- Personal passwords
- Credit card numbers
Additionally, uploading files from an unknown or unsecured source may expose the organization to security risks.
Summary:
When files are stored in an organized manner in the system, all important information is in one place and easily accessible to all relevant parties. Maintaining order in the file upload process, correctly classifying files into the appropriate folders, and adhering to security procedures — enables faster and more efficient work. The more precisely you associate files at the time of upload, the more hours of searching you will save in the future, and you will enable the entire team to work in a more organized, professional, and convenient manner.


