
- It is important to emphasize that in order for the system to identify candidates and prevent duplicates, the candidate must have a unique identifying parameter — essentially an identifying attribute that no other candidate has, such as an ID number, mobile number, or email.
- All parameters in the Excel file must be entered correctly and consistently — make sure the text is valid without gibberish, mobile numbers use a standard prefix (052), and all data is in the same format.
For example:
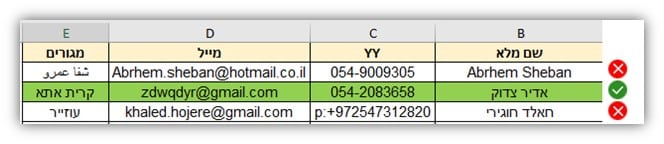
- Valid: The candidate highlighted in green is entered correctly in terms of all parameters.
- Invalid: The other candidates have errors such as the city of residence entered in Arabic, when the system’s city list is in Hebrew, and the mobile phone number has a different prefix from the other phones in the table with an added “:P”.
*It is important to note that the system is available in 8 different languages, so you can create a city list in any language.
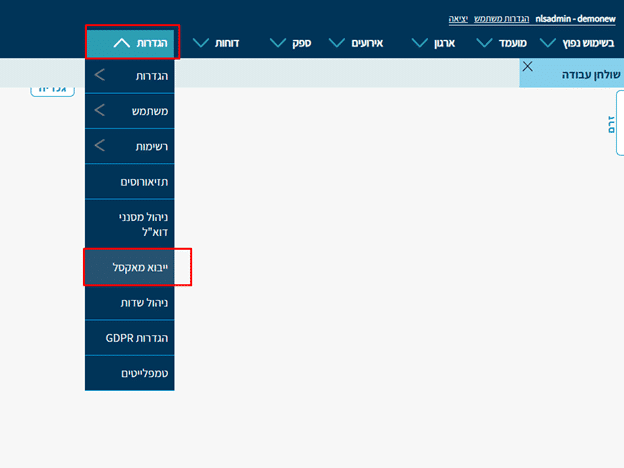
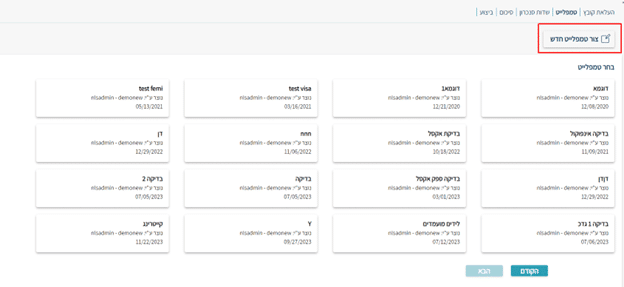
1) Via the top menu, go to “Settings” and then select “Excel Import”. If Settings or the “Excel Import” field does not appear for you, contact your managers or Niloosoft’s support team.
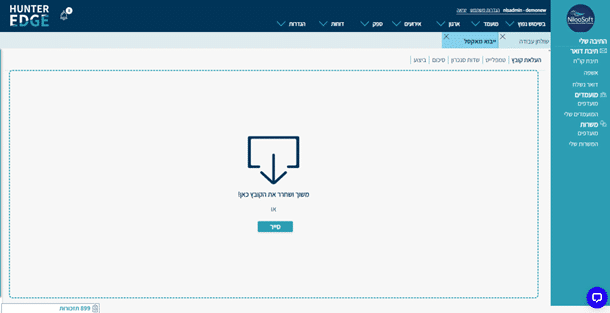
2) Drag the Excel file from your email or from the folder on your computer and drop it in the center of the screen, or click “Browse” and select the Excel file from the folder on your computer.
3) “Template” column – Here you select the structure and format for importing the file into the system. If this is the first time, select “New Template” — in the future you can reuse it if the file structure is the same.
If there is an existing template you’ve already created that suits your needs, it will appear along with all other saved templates under “Select Template,” and you can choose it to save time instead of creating a new one.
When done, click “Next”.
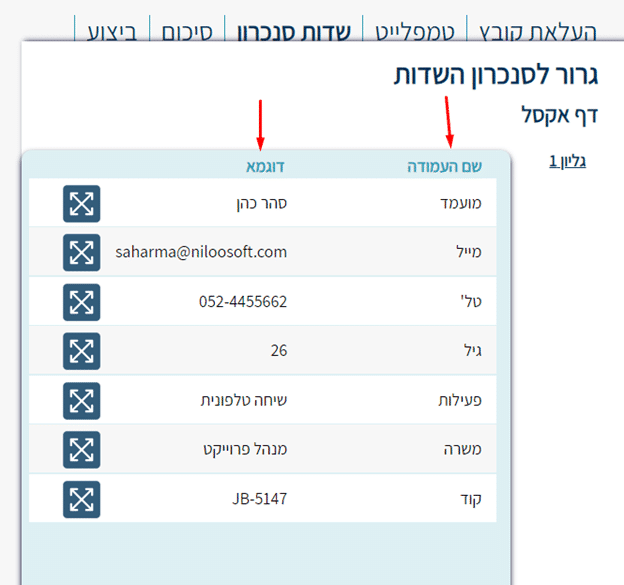
You can see that the Excel has been uploaded to the system, and for each “column name” in the Excel (such as candidate name, email, phone number, etc.), there is an “example” below which you can see the personal details of the first candidate in the Excel table you uploaded to the system.
The original Excel:

Field sync in the system:
4) Entity Selection:
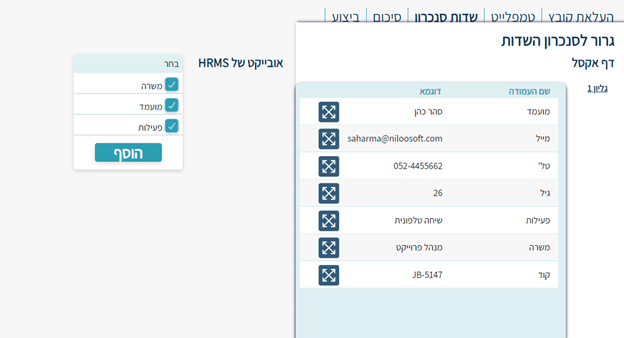
Now select the system entities that match the file in order to sync between the Excel fields and the system fields. To see all entities in the system, click the + button to select the relevant entities and their data — Candidate, Position, and Activity.
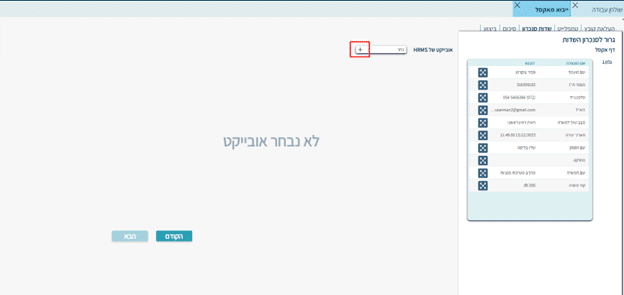
A list of entities will then open and you need to select from the three (Candidate/Position/Activity) the entities relevant to the file. That is, if your file does not contain details about the position, do not check the Position entity.
Click “Add” after selecting.
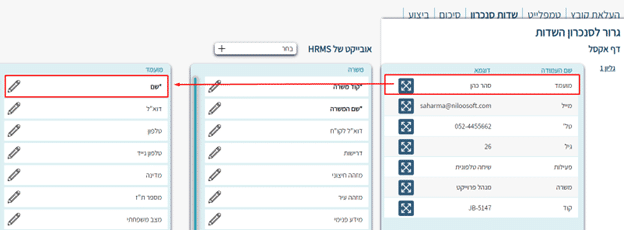
5) Matching fields from the file to system fields:
Under each entity in the system (Candidate/Position/Activity) there are fields where you can enter and record any data you want.
The required fields are “Name,” “Position Code,” and “Position Name” (if the Excel is intended for a position already created in the system).
Drag the column header from the Excel file and drop it in the appropriate field in the recruitment system.
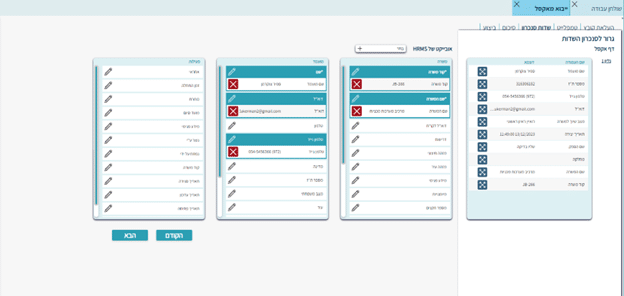
- Note that the Excel file re-creates actions in terms of position assignment. That is, if you import an Excel file that includes position assignment — the candidate will return to the status “Applied for Position” regardless of when they applied or their current status.
- Note – there are cases where not every parameter in your Excel file can enter the system (for example, if that value doesn’t exist in the system), so some fields may remain unsynced.
The same applies on the system side — not all system fields need to be filled.This is what it looks like correctly, for example — you can see that a match was made on 5 parameters from the Excel file, and some fields from both the Excel file and the system remained unused, which is normal.
When done, click “Next”.
6) Data Verification:
Now you can see that under each system field there is the name of the field matched from the Excel file.
For example, under the system field “*Name” there is the Excel field “Candidate Name.”
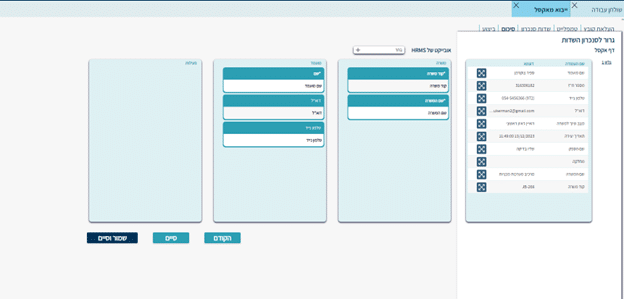
Verify that the fields are correct. If there is an error, you can always go back by clicking the “Previous” button.
If all fields are correct and valid, click “Save and Finish” — this will import the data into the system and save the template you configured for future use.
You can also click just “Finish” if you don’t need to save the template to complete the process.
7) To save the template for reuse, define the template name so you can use it next time and click “Save and Run”.
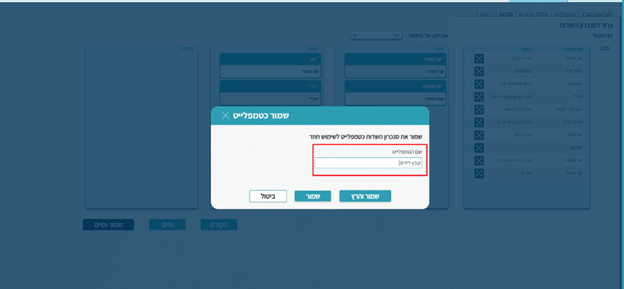
The template will now be saved along with the field matching that was done, and you’ll be able to use it next time — saving time without having to create a brand new template.
7) The system will perform the operation. Important: do not close the screen and do not perform additional actions in the system.
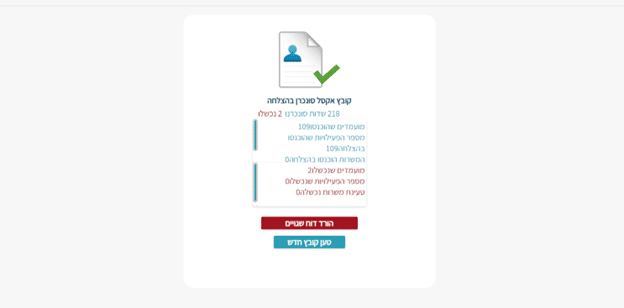
At the end of loading, a screen will be displayed summarizing all the operations performed and the candidates who entered the system.
You can download an error report on operations and data that did not enter. In addition, there is an option to load another file in the same format.