

How to Access the Assignment Status Editing Area?
1. Log in to your recruitment system
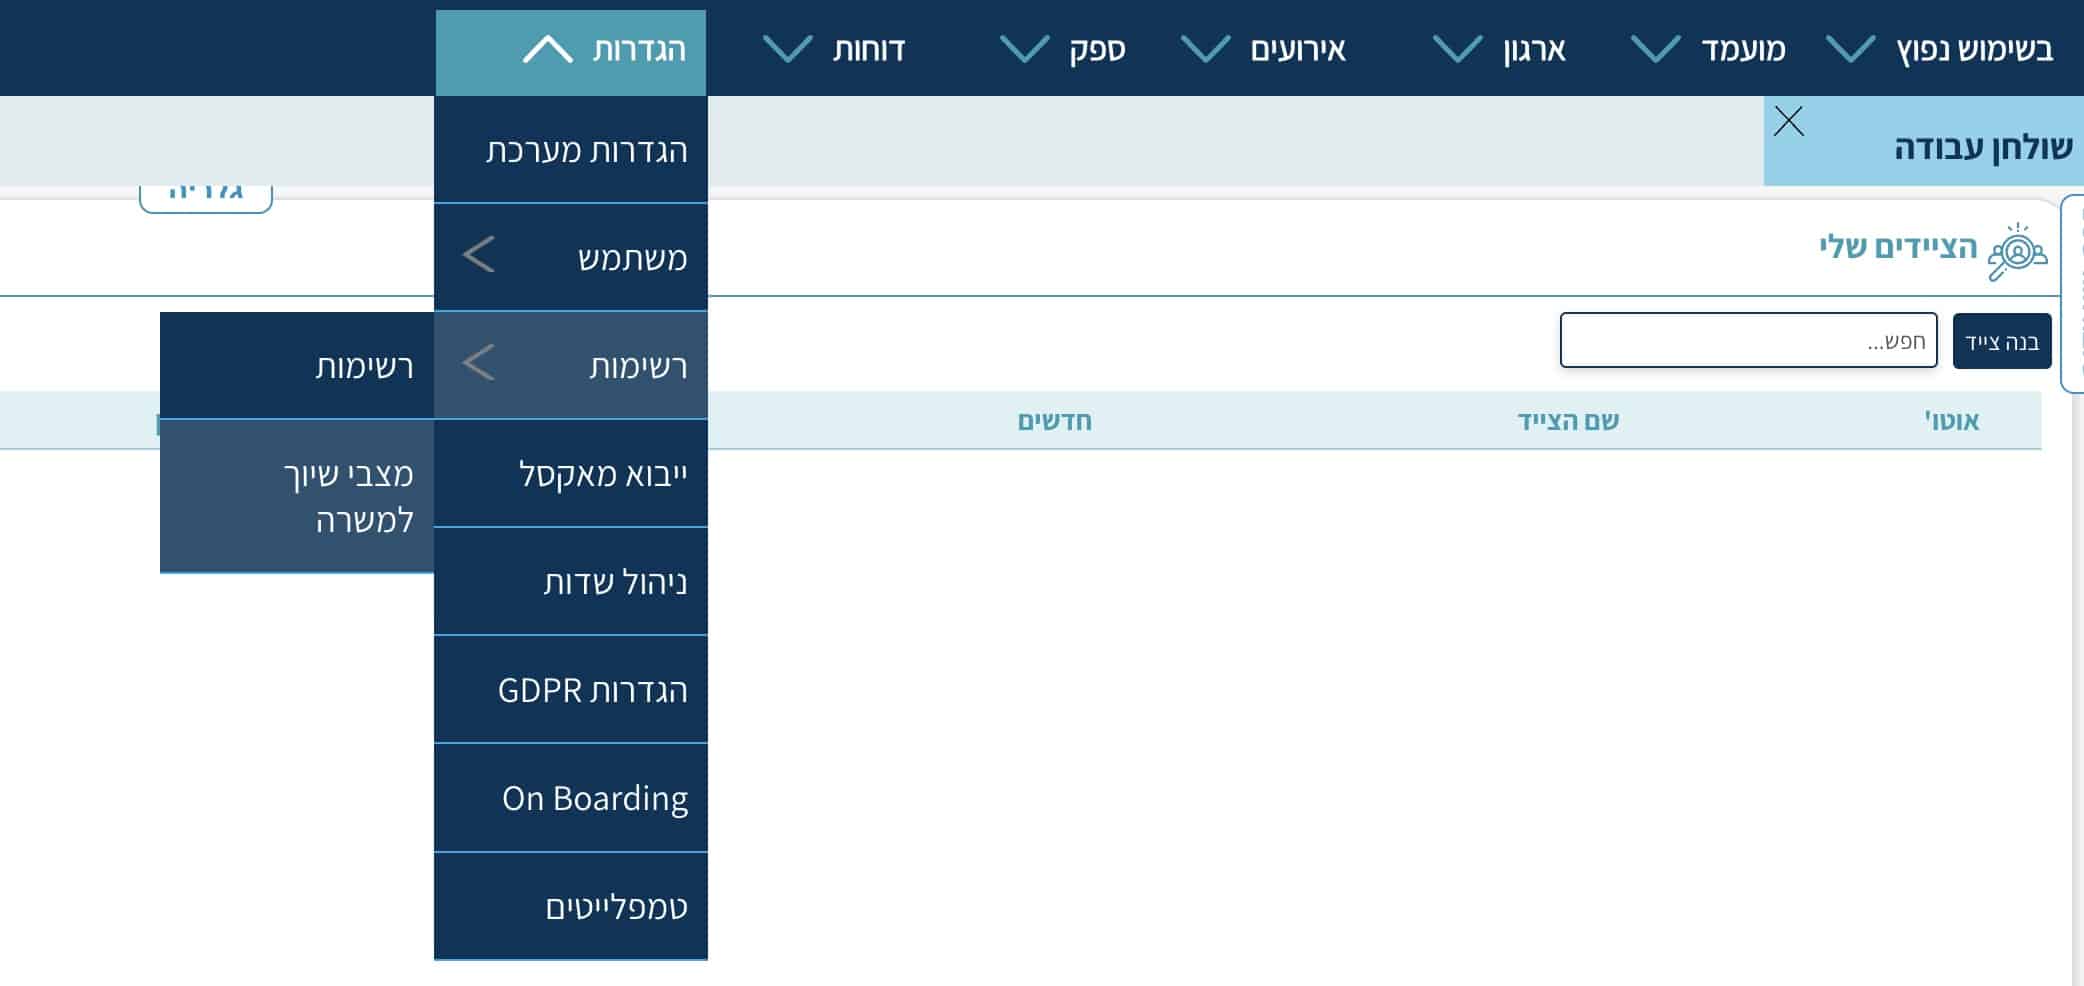
2. In the top navigation bar, select “Settings”
3. Once in Settings, select “Lists”
4. Then select “Assignment Statuses for Job Position”
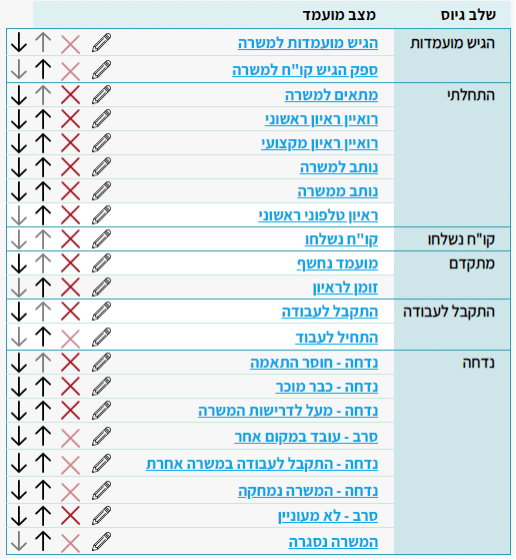
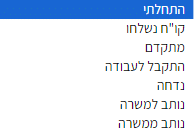
The screen that opens will display all existing assignment statuses in the system. Note that there are built-in assignment statuses that you cannot edit — you can only add reasons to them — a topic we will cover later!
Available actions:
Adding a New Assignment Status
1. Click “Add Assignment Status” at the bottom of the page
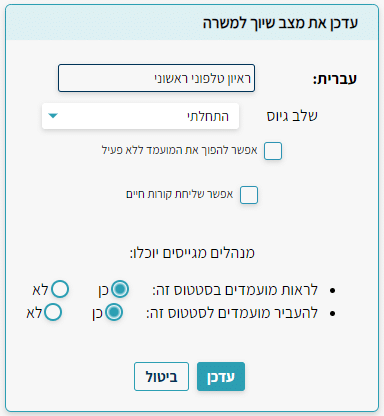
2. Enter the details of the new assignment status in the dialog box that opens
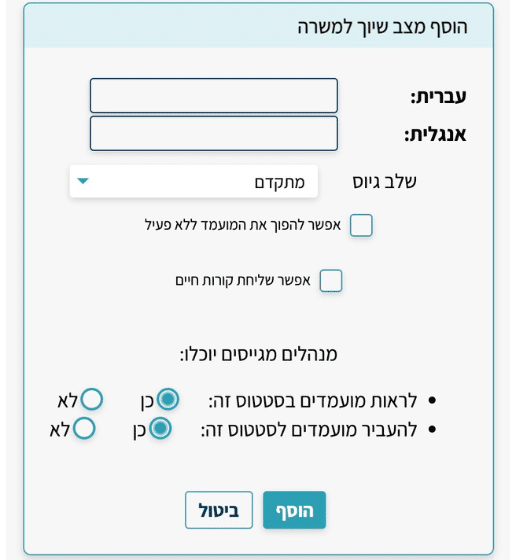
3. In the language row — enter the name of the assignment status
Note — if more than one language is configured in the system, you must provide a translation for each language
![]()
4. In the recruitment stage — click the list and select the stage this status will represent and describe the candidate’s position relative to the job![]()
5. Once that is done, choose whether to:
a. Put the candidate on a general hold if they are not relevant to any job currently in the recruitment system. In this case, click the checkbox in the “Allow making the candidate inactive” row. By checking this row, once you assign the candidate to your new status — you can easily “filter” them in the candidate search, in reports, and a different indicator will appear on their candidate card.![]()
b. Send the candidate’s CV to the hiring manager you want to share their details with. Click the checkbox in the “Allow sending CV” row![]()
c. If hiring managers exist in the system — users who are responsible for a limited number of positions within their department — you can choose whether those managers can view candidates who have reached this assignment status, and whether they can also move candidates to this status, by selecting Yes/No in the following rows.
6. Once you have finished defining the action(s) this assignment status will perform, add it by clicking the “Add” button,
or cancel adding the new assignment status by clicking “Cancel”.![]()
7. After adding, you will see that the new assignment status has been added to the list of existing assignment statuses in the system and is ready for use!
Editing Existing Assignment Statuses
1. Select the assignment status you want to edit by clicking the pencil icon in the assignment status row. Note that the names of the built-in assignment statuses cannot be edited at all.![]()
2. In the update window that opens, enter the details you want to edit:
3. Assignment status name
4. Recruitment stage — select from the list
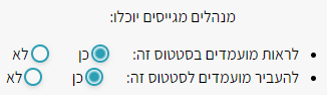
5. Allow making the candidate inactive — by checking the checkbox, candidates moved to this assignment status will be put on hold, you will see an indicator on their candidate card, and you can filter them from reports and search views.
6. Allow sending CV — by checking the checkbox, you can send CVs to hiring managers from this assignment status.
Hiring managers will be able to:
a. View candidates in this assignment status — as part of the hiring manager configuration, they only have access to what we define for them (candidates for their jobs only, which jobs they can see, and which assignment statuses they can view and enter).
b. Move candidates to this status — in addition to viewing, here you define whether hiring managers can assign this status to their candidates
Deleting Existing Assignment Statuses
1. To delete an assignment status in the system, click the red X in the assignment status row![]()
Note — some assignment statuses cannot be deleted, and they are:
Applied for Job, Vendor Submitted CV for Job, Started Working, Declined – Working Elsewhere, Rejected – Accepted for Another Job, Rejected – Job Deleted, Job Closed.
2. After clicking the X, the row will disappear from the display and from the system.
Changing the Display Order of Assignment Statuses
You can change the display order of assignment statuses within their stages by clicking the arrow buttons in their row, for example: ![]()
1. To move the assignment status up in the list view, click the upward arrow
2. To move the assignment status down in the list view, click the downward arrow
3. If the arrow is grayed out — the assignment status is at the very top or very bottom row for that recruitment stage and cannot be moved up or down in the blocked arrow direction.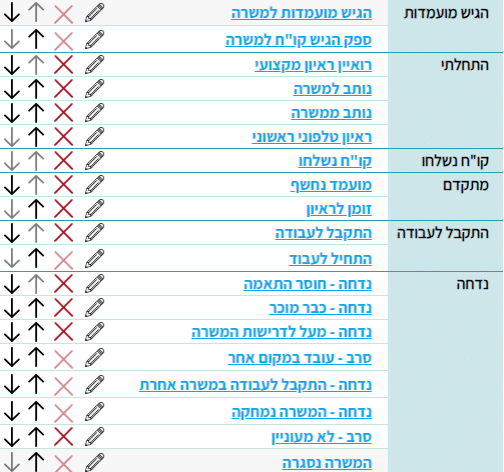
Adding a Reason to an Existing Assignment Status
To add another layer to assignment statuses, you can add a list of reasons to each one.
1. To add the desired reasons, click on the assignment status name ![]()
You will then be taken to the following page:
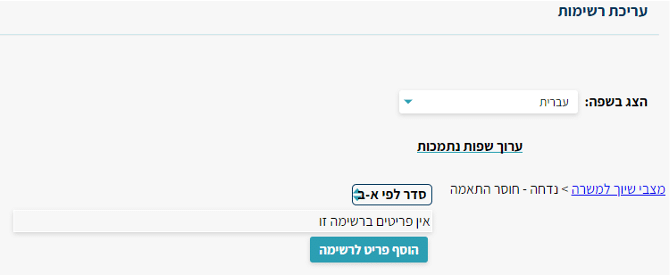
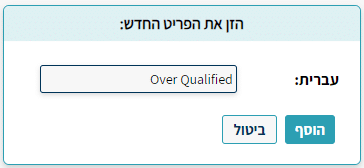
2. Click “Add Item to List” to add a new reason
3. In the dialog box that opens, enter the desired reason and click “Add”
4. The item will then be added to the list of reasons for assignment statuses

5. Here too you can:
Edit the reason![]()
Delete the reason![]()
Change the position of the reason in the display![]()